Try just changing the ‘dot’ image location, by editing the ‘X Position’ and ‘Y Position’ fields:
X Position
(160+sin(-rad(#DWFSS#-180))*150)
Y Position
(160+cos(-rad(#DWFSS#-180))*150)Try just changing the ‘dot’ image location, by editing the ‘X Position’ and ‘Y Position’ fields:
X Position
(160+sin(-rad(#DWFSS#-180))*150)
Y Position
(160+cos(-rad(#DWFSS#-180))*150)Hi @selia67 and thank you for the link. I checked it and saw, that it’s actually good way with some a bit longer steps than necessary.
1 - for the moment we could leave the white dot for near future - this effect is only a small one anyway 
2 - let’s start with only one hand - to make it easier (as you did)
3 - here would be my way how to manage the basic 3D and shadow
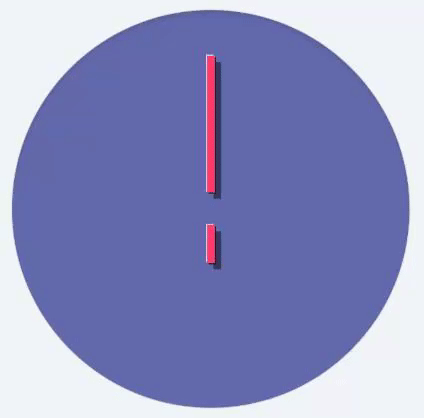
Simple 4 layers. The X and Y Position changed only ± 1 point from the middle (160) at white & black part of the hand. The Shadow (Black 50% Transparency) is set at 164 x 164.
In your case I would just work with the shadow at the beginning - big effect and super simple
thank you for this Tomas. I re-did it , take a look now please and see if im on the right track. For someone thats not used to anything but basic lol…sometimes remember that for a newbie face maker…we have no clue whats going on , such as :
we have 4 layers here and I was’nt sure if i needed shadow on each layer or just the black
Now I was having trouble shrinking the 4th layer because the color is so close I couldnt tell how small I was shrinking it to. SO i changed the pink on that 4th layer to blue so i could see it and then switched it back to lighter pink.
Now to a seasoned face maker…they are used to how much to decrease to and such . See if I managed to get it partially right …haha its at the same link
Hi @selia67, it looks great now (somehow is appears to me that the object have two shadows).
I am using the trick with changing color on some object to easy identify them too
Now, you do have a realistic hands - what is the next job? 
I want to learn animation …nothing complex…just cute stuff…
I also want to learn to have that object move around the outer edge of the face without showing the second hand. Andrew.dowden posted a link i want to take a look at tomorrow .
But Im willing to learn anything that is fun and geared for a newbie to understand. You guys are soo sweet to help me.
I do want to start making my own designs without using Cell phone wallpaper for backgrounds. I noticed on the tutorial you just taught me, it also had the background appearing to be 3d as well…I might play with that a few hours just to make sure the 3d effect concept has sunk in lol
…well animated cute stuff Here you are:
Tomaja Micro Tutoria for Moving Objects
Simplified here is a expression to copy into your X and/ or Y position:
(160+( * 20 * (sin(((#DNOW#/1000) * 2 * pi))))))
You will see the effect immediately
…you got also great expressions from @andrew.dowden to making a circular motion
Enjoy the creative part of making a watch face 
Thank you so much…I will play with this when i get home tonight. Can you point me in the right direction to finish your 3d tutorial. Id like to finish that first before i move on.
Im speaking of the background 3d part. I played with it a bit last night and wasnt getting it…maybe i was starting in the wrong place. Instructions on just a few rows would help me to understand how you got it to look so awesome…thx
Let’s have a deep look into some parts (you are interesting in) in my open inspection mode - you could compare it with your watch face step by step
Some animation stuff that was helpful for me when I first started…
Simple looping background (2 images) - Moving/Looping Background
(Two images placed side by side and moved off screen helps achieve the illusion of movement - it’s like taping two pictures together to make a tube and rotating that tube. Obviously both pictures would have to line up at the ends to preserve the illusion)
There’s lots of animation tutorials that go into heavy detail and are frankly overwhelming. The key information to take from them is that generally you’ll want to keep to less than 30 or 50 frames of animation. Too many layers makes it hard to edit the watch (slows down the editor) and makes the watch take longer to sync, especially if layers aren’t optimized. Usually you’ll want to tie your animation to the #DWE# tag which triggers animation when the watch wakes up. What’s helped me is a tool developed by Facer to automate that math needed found here: https://codepen.io/wutronic/pen/EoEpWO
Advanced animation techniques: There’s a method called squarewave animation that lets you animate two different objects at different times which helps it to not look like someone playing a clip over and over. There’s a method called interpAccel to make objects move. Here’s both of them:
[Mini-Tutorial] InterpAccel - Fly In Motion
https://news.facer.io/two-second-loop-923180c37d53
MORE: https://news.facer.io/tutorials/home
Another great advanced tutorial that shows how you can pull off illusion of movement with small simple tricks:
[TOMAJA Tutorial] 1 Hour Animation Loop as a Combination of Different Movements
Still cant wait to get into this more for the next step. Grandbaby has had a temp since Monday and I really didnt have time yet to do anymore but play around with another face or 2…but i am interested in learning all i can .
You guys rock !!!
what is the purpose of your Circle extra B and Circle extra C and ALL the outer items thats not part of the face?? just wondering what they do
…this are elements for the screws in the edges. You could see them only at the square watch faces
Thx…good tip…must keep in mind that not everyone has a round watch face .
Ok another question: On the tic marks you have 2 of the styles added to the face…when inspecting the face we cannot tell which tic style you used first …I figured it out i think…however all 4 shows both tic marks at the same time. Was a bit confused how to add 2 styles to the first step of tic marks.
Also WHAT is the purpose of JUST Black for DIM ? in your face it really shows much of nothing. BUT when i added it to mine right before putting the hands on (just like yours) it turned my face almost black…Not sure why?
Hi @selia67, good questions
Basically I double objects to let the second one be a shadow (black tint at app. 50% of transparency).
Black DIM Circle covers all the watch face behind the hands to save energy in general. This object, however, is active (visible) only in the DIM (AOD) mode.
Ok this is where Im learning. I never really dealt with the DIM mode, and that was one thing on my list of things to do.
When I added this step as you did…my DIM is completely black and my active looks like your dim. I know im missing a step here. Facer - Thousands of FREE watch faces for Apple Watch, Samsung Gear S3, Huawei Watch, and more
tried to figure this one step out and im stuck i posted link above…its the step right before adding the hands that is suppose to effect the DIM area only thx
Hi, please try to check the “eye” icon at every element separately in active and DIM mode… this icon shows you if the element is visible or not
Hopefully others will find the information and questions / answers in this post as helpful as I have.
I told you i was a noobie , haha I think my first face published was end of may …so yea I havent been around long.
Can I hug you now…I never even noticed that eye till you mentioned it …this opens up a whole new world of fun … Thx…Im going to finish this face i was copying of yours because it made things so much clearer what makes things tick…I’ll check back once i start another learning project. Theres a certain type of software im saving up for that will make things alot more interesting. I really am ready to move onto the next step of face making.
Wonder if i should go back and remove some of my more basic ones thats had little interest or leave them. hmmm thats a project for another day haha