[Charlie Design - Gradient battery demo - watch face for Apple Watch, Samsung Gear S3, Huawei Watch, and more - Facer]
I wanted to post a tutorial on how to create a gradient battery progress bar or pair of bars. Inspector mode is enabled on my design. The example is for a horizontal bar but making a vertical bar uses the same procedures.
When making your bar, first grab a multi color gradient of your choice and add it as an image. Place it where you want and use the width setting to set the length of your bar and the height setting for the bar thickness. If using two bars create a rectangular block between as in my example.
Next make a rectangle (“battery progress watch” and/or “battery progress phone” in my example) a little higher than your visible bar and wider than your gradient image. Use a different color than your background as a start so you can see it and set the opacity to 50%. Now place the rectangle to the far right of your image with the left side of the rectangle at the 100% mark. Make a note of the X setting.
In my example the X setting is 245 (click on “demo 100% position”). Next move that rectangle to place the left side where it lines up with the 0% position and make a note of this X setting. In my example the X setting is 75 (click on the “demo 0% position”). These demos are turned off so you don’t see them and only there to demonstrate how you arrive at a moving X formula.
Next subtract the 0% number from the 100% number, in my example 245 - 75. Take the result (170) and divide by 100. The result is 1.7.
Now place the following code into the X setting of your rectangle:
(75+(#BLN#*1.7))
This is the 0% X setting + (watch or phone code x the 1.7 figure)
Set the color of the progress rectangle to match your background and set the opacity to 70% or tweak it to your liking to shade out the used amount battery level.
Please let me know if anything is unclear.
8 Likes
Very nice. I shall be inspecting this soon.
I had fading colour nailed (undecided on exact expressions whether to use clamp ot not as it didn’t matter in context so watch doesn’t use it but phone does) but here’s my template for reference:
A gradient version would be excellent. I look forward to delving in to your tutorial
Also, if you link your watchface here with only the face ID it gives a preview so I just pasted https://www.facer.io/watchface/zkEM96OHHv on a new line.
3 Likes
That’s brilliant @thomasfmal well done for helping everyone to learn these skills 
3 Likes
Its all good, every tutorial is welcome.
But for those who came for the gradient it self, here you are:

6 Likes
Thanks for adding that, I didn’t think to do it…!
3 Likes
I made MAG 1503 using a graphic that looked just like that.
6 Likes
I’ve been trying this the last few days and came up with a way to do a circular gradient using a gradient image created in photoshop. The image reduces in size (tied to Steps in the example) and the uses an overlay progress bar (in reverse) to reveal it as the step count increases. Target steps set to 2000 for the example.
4 Likes
@mr.damianscott . Brilliant PS work. Thanks for the Inspectable. Perhaps you would share the Gradient ring. Thanks for the Master level Tutorial.
2 Likes
I made this for people who do not have Photo Shop or Know how to use Advanced graphics packages. Sadly it will only make a liner grad. I would be possible to make a 3 colour circular one. I find Creator a usefull tool for Basic stuff. Also it is good to play with shapes, Opacity and Colour to see what is achievable in Creator.
.
.
3 Likes
Make the steps font the same as the distance font - duplicate on Dim face and l for one would wear it.
I’m not skilled enough too make tutorials but I think everyone is grateful for designs where inspection is on and even more so when the resources are also shared!
4 Likes
Yes Some Battery Reserve Indication on there and It would be a Unique and Popular ECO Face . 
2 Likes
No problem.
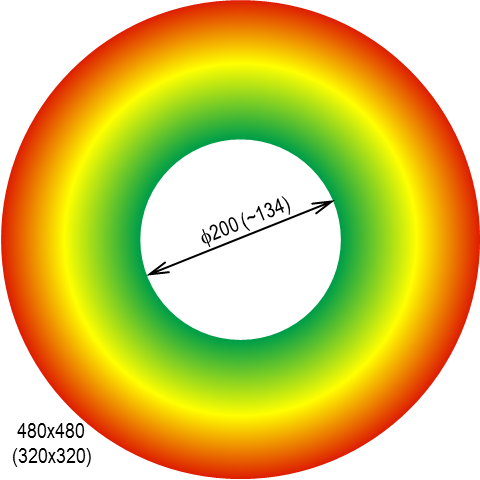
So I used (490-(clamp(#ZSC#, 0, 2000)/11.7647)) as the width and height and this will decrease the size of the gradient image as the steps increase thus changing the colour to green as you reach the target.
The 11.7647 is calculated from, stepsTarget/(maxWidth-minWidth),
2000/(490-320) = 2000/170 = 11.764.
Do the same for the height to keep the circle a circle.
So in this case, at 0 steps the image is 490x490, leaving 10px of a red ring. As the steps get to 2000, the size of the gradient image decreases to 320x320. I used a black circle to mask out the gradient part we don’t want to see, keeping the ring at 10px.
For the progress, I used $#ZSC#<2000?((2000 - clamp(#ZSC#, 0, 2000))/2000):1$ with Reverse turned on.
6 Likes
Oh this is just for demonstrating the progress gradient, it’s not actually a design I’m working on.
3 Likes
Hey thanks for sharing that . Sometimes adding to a Tutorial like that makes it become a Masterclass . Many makers benifit a great deal from the explanation of the Maths Development Process .
3 Likes
But you might make it in future though?
It’s a simple design and with the additions mentioned above it could be quite popular 
3 Likes
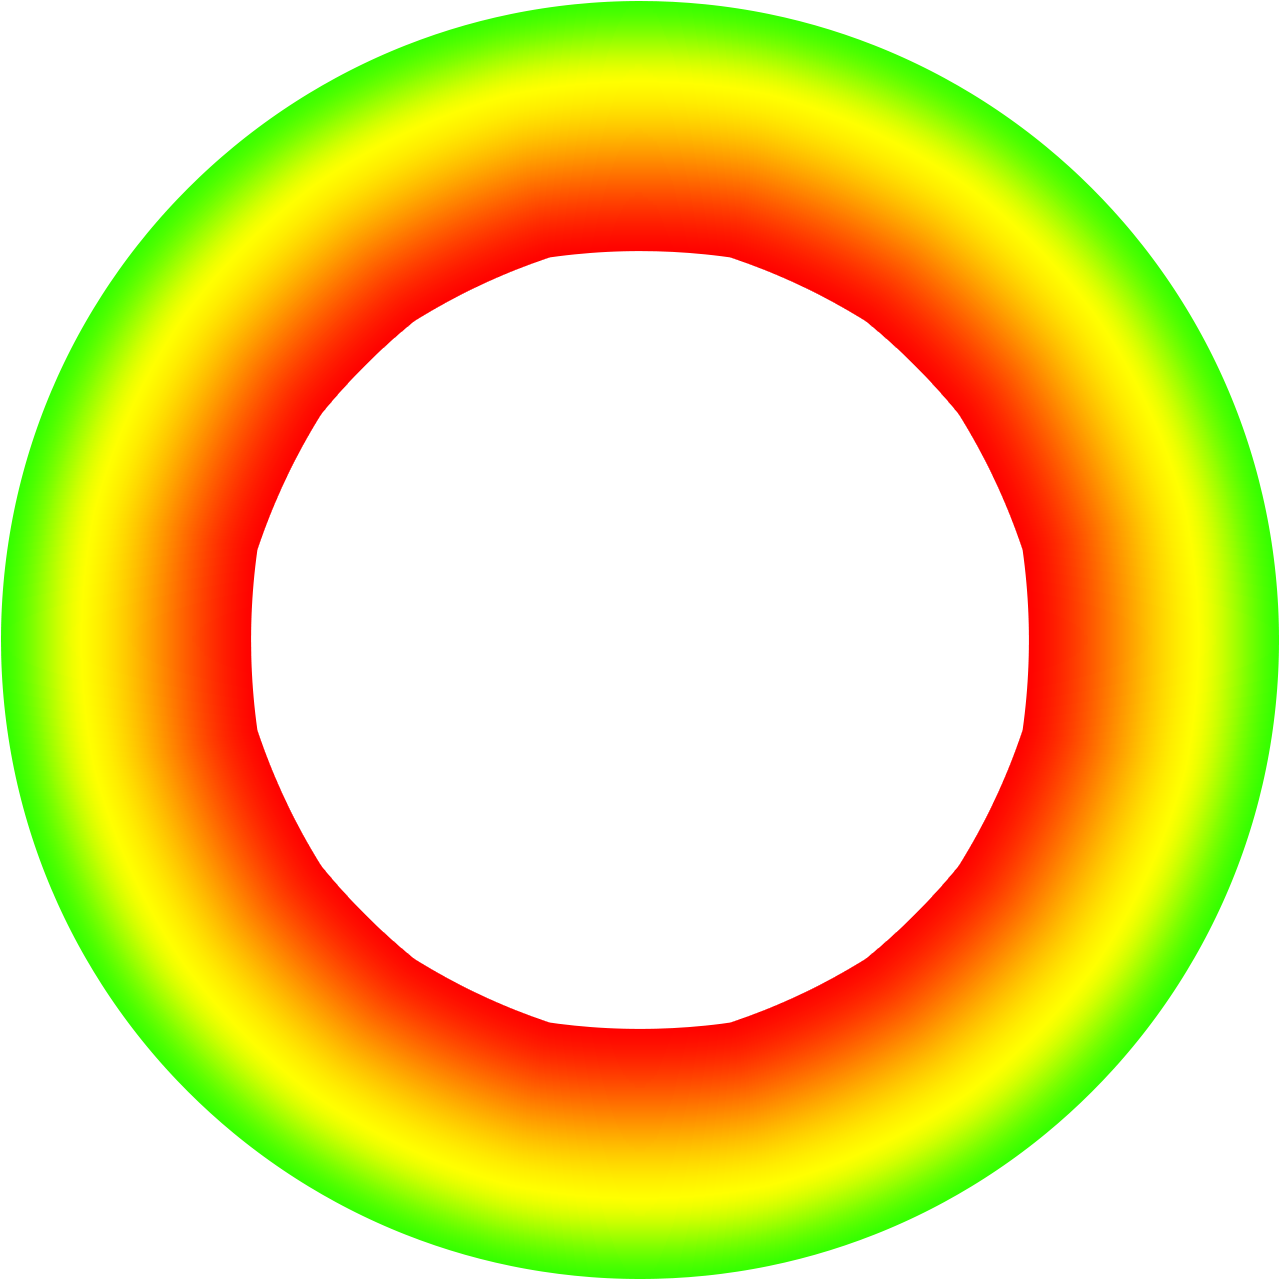
I like the Doughnut idea. For the case, you would like to invert the logic and start on red when 0 and make it grow with the steps or battery, here are the colors other way round. Sorry, that gradient is not perfect, just fast slapped together in powerpoint.
5 Likes
Fantastic . Thanks Peter .
Here is a Creator Tool for making Disc Grads . Of course it can not be exported but a Screen shot will give you a resource at 960x960 PIXEL in your Downloads Folder . Most Graphics Packages have a bucket fill that can be set to Transparent to cut out the Black . The example I have posted hers might be good for the Temperature . In any even it might give someone a little practice with something they have not used in creator Before .
.
.
3 Likes
Now that’s thinking out of th box! I like that!
I don’t think I would have come up with that. Simply brilliant!
4 Likes
Forgive my ignorance here, but can’t the same effect be accomplished using the simple Arc Shape provided 
3 Likes
No, no simple solution with standard shapes and arcs. I think you would need a lot of arcs to get a smooth color transition. I’ve done it with 3 arcs on top of each other with different opacity for the battery meter in the watch face below:
Fill ratio of the arc for battery level >80:
$#BLN#>80?(#BLN#*.005-.4):0$
Opacity: 100
Fill ration of low batter level arc.
$#BLN#<20?(#BLN#*.005):0.018$
and Opacity: $#BLN#<20?40:0$
Fill ration of arc
$#BLN#>=20?(#BLN#*.0011+0.077):0$
Opacity: 68
Sounds a bit complicated, but for those interested, it is inspectable:
4 Likes