I know this is possible after seeing this on other watches…
ARC battery charge meter
How could I set something like this up on my watch utilizing the Progress Element
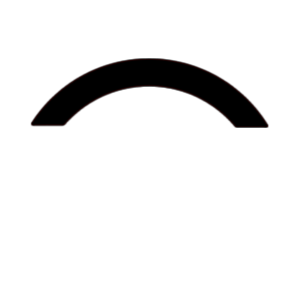
I’d like for the arc to contract from right to left. I’d have another graphic below (RED) as the base background if that makes any sense. It looks like the FILL RATIO is .20
I don’t remember who posted this originally or I would attribute it to them. I found it here in the community.
DIAL GUAGE FOR BATTERY
Firstly you should understand that Facer sees the top point of a dial/circle as 0 degrees.
Next, you need to work out the angle position of your markers for 0% battery level and 100% battery level. In my example above, the 0% marker (red) is -90 degrees from the top of the dial and the 100% marker is +90 degrees from the top of the dial. This means in total the hand has to rotate 180 degrees (90 degrees from -90 to 0, then 90 degrees from 0 to +90)
Next, the battery is represented as a percentage, which means it has 100 x 1% increments. To work out how far the hand has to rotate for each 1%, we divide the total rotation amount (180) by 100 which gives us 1.8 degrees (180/100=1.8). So we now know the hand has to rotate 1.8 degrees for each 1% increment of the battery level.
Now we can put the formula together:
(START ANGLE POSITION +/- (BATTERY PERCENT NUMBER * 1.8) or (-90 + ( #BLN# * 1.8) )
(-90+(#BLN#*1.8))
This will give you an idea on how to do half battery rings. Doing a smaller amount just means increasing the /number higher than 200. For example a 1/4 battery ring would use (#Battery-Tag#/400) The only problem you will have is that if you use any BG higher than 0 in the BG Opacity box it will be a full circle background. You will have to use zero and make your own background for the progress.
That Tag Maths would be for the rotation of the Arc / Progress.
The Fill would be what you have used.
You can combine the Two and have a nice Symmetric. Pie Chart Gauge if you have a problem like I do with things being asymmetric : )
I used (180-(#BLN#)*1.8)) on the one above but (-90+(#BLN#*1.8)) on another face to reach empty on the left.
In fact the hours minutes and seconds on that face are all arcs but with no rotation of course:
I lilke to make the odd inspectable samples for things I have had to look up:
I think (180-(#BLN#)*1.8)) goes well with the notion of a battery draining.
All looking good . I see you having a bit of an adventure with the Parts. I like Arcs for the simplicity of them and a Background would be independent . I can only talk about my feelings for things but I like the Battery Gauge to be a smaller part of the whole face . The Symmetric Depletion works for me like the water level in a glass or the sand running out of a timer. Oh there is a good Idea. Good to have a play with relatively simple stuff to learn which numbers you can change.
I see you found out how to share your Drafts. We struggled when the Beta7 turned up. Are you on Beta ? I should be able to tell you I suppose.
I quite lilke the round the edge approach as it is thin but very visible leaving room for more watch content.
I’m devinitely siding with the top down approach though. I think I’ll update Simple Simon V3 accordingly.
I was on beta but tead a post that people were having truoble inspecting them if you published in beta and I noticed no difference in the design process from my end. I just came out of it.
The wonderful thing about Facer is there are no restrictions on Publication . Apart from the obvious of course.
I have posted Stuff on this subject before . Duplicate Your Design before you Publish
Duplication before Publication
If you Duplicate a Publication and work on it again the File name does not get updated ( if you change it with a revision number say ) on Watchbox and What is being worn on peoples Profiles. So it gets a bit confusing if you make small changes. I keep forgetting as that is where I am in my life . Get into some right Pickles I have deleted so many publications to try sort it out.
I have raised the Question with Facer but I don’t think they understand what I am trying to say.
Oh, I remembered reading this a couple of days ago and thougtht I’d give it a go before coming back to the topic.
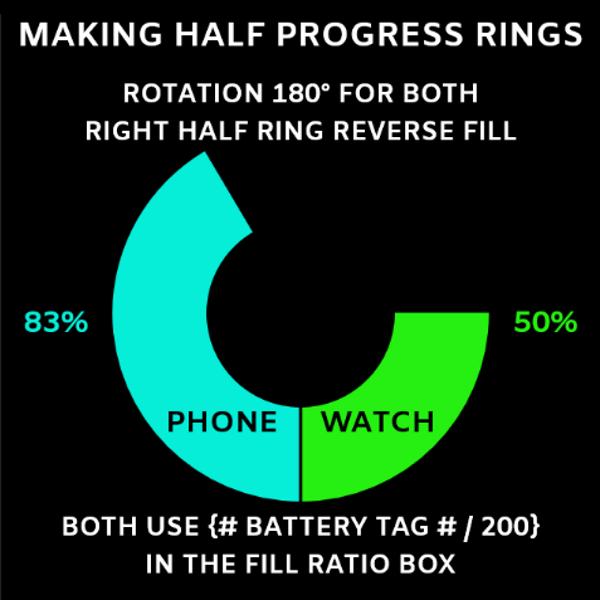
I Started with the 2 battery level arcs:
Watch: 180 rotation, non reverse fill (#BLN#/200)
Phone: 180 rotation, reverse fill (#PBN#/200)
Then the 2 used battery arcs to mimic progress rings were the same colours at 50% Opacity:
Warch: 0 rotation, reverse fill ((100-#BLN#)/200)
Phone: 0 rotation, non reverse fill ((100-#PBN#)/200)
I suppose technically, as they were behind the others I could have left the 2nd 2 at 100 fill but for completenes…
Yeah you did not need to move the Battery gauge background but it is all learning.
Here is a thing I do for the Opacity in case there is no data ( NOP ) from the Batteries . Just gets rid of the indicator altogether so there is no confusion : )
I initially set up the 50% opaque version for used battery with the inverse fill just so I knew I had it correct but I guess just leaving the fill at .5 would reduce the processing per battery level chage (or even polling for information to check the fill and this make the face very, very slightly more efficient.
I was thinking that but wanted to post what I had done here so the explanations were out in the open for others.
Also, is there not just something… Extra, about circular progress elements that are segmented?
Yeah segmented is much more grown up. I like a studio clock Second. The next thing to do is get the gauges to jump between segment, but seriously there are few that would notice. The ones that would notice would tell you not to bother.
I would not concern yourself about making efficiant designs at this stage. The best battery saver is a black face. The watch I wear most of the time is a 100 layer piece of Bloatware and the amount of battery it uses is all about the number of times I look at it.
I find a lot of syncing during testing drains the battery. So there is a simple answer. Just leave it alone.
I am really pleasantly surprised at my Gen 6. A lot of reviews slated the battery but I am still getting over 24 hours even with all the syncing and checking with the timout upped to 10s from 5.
You can probably tell by my Simple Simon leaders on the faces that I am mainly focused on a simple end redult, regardless of the creation complexity.
It is mainly why I stick to stock built in elements with exceptions being your wind icon and a custom battery outline that was just made from a screen capture of the native Facer one and turned into a white on transparent gif. Pair that with a rectangle and job’s a goodun.
Thinking of doing a roundup of things I have learned in my first week (and a bit) of designing faces here.