Hi, I programmed it myself.
1 Like
Hi friend, as error says, it seems like you are missing some DLL files.
Try installing Microsoft Visual C++ Redistributable for Visual Studio 2015, 2017 and 2019 Latest Supported Visual C++ Redistributable Downloads | Microsoft Learn
Please let me know if that fixed the issue.
Hey @BIELITZ, maybe it could work if you used the installation method B, that its runing the project from the source.
Hey @tudza at this moment its not possible, the text will be always be oriented to the center. Let me take note of that for a future feature.
Thanks
1 Like
Yes it was. Are you still going to work on it to improve it more?
Linux Mint Cinnamon already has Python i foumd out whilst trying to install it! I dont think im smart enough to figure out the rest i tried downloading Radian but failed. I would appreciate if sometime in the future you could make some more detailed instructions. Until then I will use the tools i have. Im sure everyone appreciates the work you have done on this great tool.
1 Like
Yes, I will improve it in my free time
3 Likes
Hey KOI, can’t wait to see what becomes of this ![]() Endless nights of trying to perfect the tachymeter alignment might just come to an end!
Endless nights of trying to perfect the tachymeter alignment might just come to an end!
3 Likes
Maybe one day, we’ll be able to actually make working tach/chronograph faces again like the old days. ![]()
![]()
5 Likes
I highly doubt it. It is off topic, but I had some funny chat with copilot about this and conclusion is: Google will never ever return timers to the watchfaces.
1 Like
@kirium0212
With Samsung having a stopwatch app you can to the tile screens on the Galaxy watches, there really isn’t a need to do it in a watchface anyway. Plus, you would have to have the pro upgrade to make one and premium upgrade to use one. What’s the point of all that when you already have it in the watch?
2 Likes
can we have a tachymeter or telemeter on the stopwatch app? I know its a niche feature, but why else would I want the stopwatch function integrated to my face design? The cosmetic lookalike can be added even to a jumping second hand, but such misses the point again
2 Likes
Does there have to be a point to everything? People who appreciate watches like myself just like the idea of being able to do anything and everything a traditional analogue watch can do whether it be chronograph, tourbillions, split-timer/rattrapante etc, etc. It was part of the joy for me back in the day making watch faces that could have all these features whether they were used or not. Who the hell uses a tach on an analogue watch today? And what for? To watch a race? To cook a soft boiled egg? Yet, they are still made.
2 Likes
You’re preaching to the choir here. I have several chronometer watchfaces made when I had the pro upgrade. Most were pretty much ignored. It was a fun experiment, but that’s all.
1 Like
An experiment for you perhaps. You’re asking me “what’s the point” and I told you what the point is for me.
3 Likes
This would be a very boring world if we were all the same. As the French say, “Vive les différences”.
2 Likes
For those wanting to Run KOIs Radian tool on Mac and struggling to do so, below are some instructions I used to get it all working. - There is a Quick copy-paste version (one block) at the end of this to make it a breeze. I have tested it on my mac
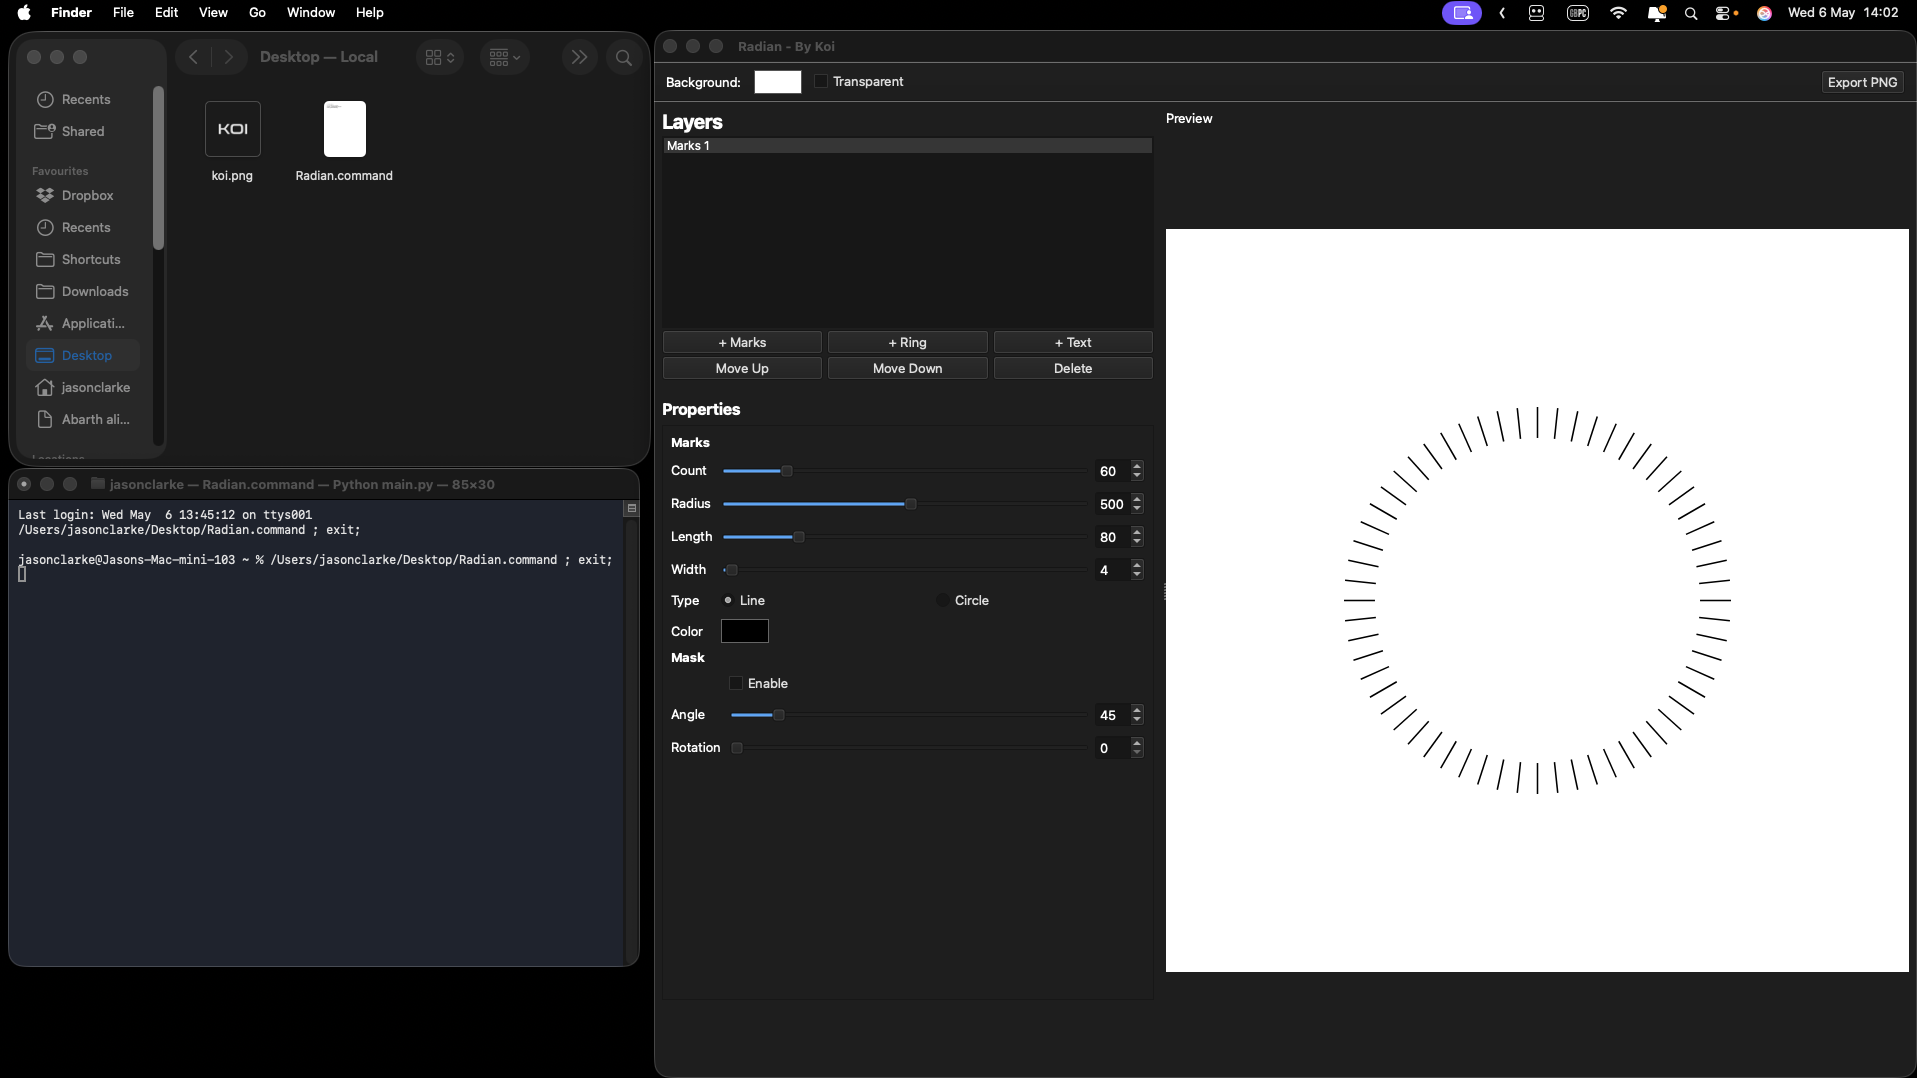
Running Radian on macOS
Step-by-step guide to fork, install, and run the Radian Watchface Generator on a Mac. The upstream project lives at GitHub - koidevstudio/radian: Radian is a tool for easily creating radial elements for watchfaces. · GitHub — this guide walks you through forking it to your own GitHub account so you can keep your own copy and contribute changes back.
Tested on macOS with Python 3.14, Apple Silicon (M-series). Should also work on Intel Macs and any Python 3.10+.
Prerequisites
- macOS (Apple Silicon or Intel)
- Python 3.10 or newer installed. Check with:
python3 --version
If missing or older, install from Python Releases for macOS | Python.org or via Homebrew (brew install python@3.12).
- A GitHub account (free). Steps below if you don’t have one.
- Internet connection (the Python dependencies are ~450 MB).
You do not need Xcode or git installed — we download the source as a zip.
Step 1 — Create a GitHub account (skip if you already have one)
- Open Sign up for GitHub · GitHub in your browser.
- Enter your email, create a password, and pick a username — your username will appear in your fork’s URL, so choose something you’re happy with.
- Verify your email address when GitHub sends the confirmation link.
- Sign in at https://github.com.
Step 2 — Fork the Radian repository
A “fork” is your own copy of someone else’s repository on GitHub.
- While signed in to GitHub, visit GitHub - koidevstudio/radian: Radian is a tool for easily creating radial elements for watchfaces. · GitHub.
- Click the Fork button in the top-right corner.
- On the “Create a new fork” page, leave the defaults and click Create fork.
- GitHub will redirect you to your fork at https://github.com/YOUR_GITHUB_USERNAME/radian — keep this tab open, you’ll use the URL in the next step.
Throughout the rest of this guide, replace YOUR_GITHUB_USERNAME with your actual GitHub username.
Step 3 — Pick a folder for the project
Open the Terminal app and create/enter a working folder. This guide uses ~/Projects:
mkdir -p ~/Projects
cd ~/Projects
Step 4 — Download your fork’s source
Replace YOUR_GITHUB_USERNAME with your GitHub username before running:
curl -L -o radian.zip https://github.com/YOUR_GITHUB_USERNAME/radian/archive/refs/heads/main.zip
unzip radian.zip
mv radian-main radian
rm radian.zip
cd radian
ls
You should see main.py, requirements.txt, and folders like core, ui, elements, export, fonts.
Step 5 — Convert requirements.txt to UTF-8
The repo’s requirements.txt is saved as UTF-16, which pip on macOS can’t read. Convert it once:
iconv -f UTF-16 -t UTF-8 requirements.txt > requirements.utf8.txt
mv requirements.utf8.txt requirements.txt
Step 6 — Create a virtual environment
A virtual environment keeps Radian’s dependencies isolated from your system Python.
python3 -m venv .venv
source .venv/bin/activate
Your prompt should now start with (.venv).
Step 7 — Install the dependencies
pip install --upgrade pip
pip install -r requirements.txt
This downloads numpy, pybind11, PySide6 (Qt 6 GUI), shiboken6, and skia-python. Expect a few minutes — PySide6_Addons alone is ~330 MB.
Step 8 — Run the app
python main.py
The Radian window should open.
Step 9 — Create a Desktop launcher (optional)
Make a double-clickable shortcut on your Desktop so you don’t have to use Terminal every time. Run this in Terminal once:
cat > ~/Desktop/Radian.command <<‘EOF’
#!/bin/bash
cd ~/Projects/radian
source .venv/bin/activate
exec python main.py
EOF
chmod +x ~/Desktop/Radian.command
This creates Radian.command on your Desktop. Double-click it to launch the app.
First time only: macOS Gatekeeper will block the file with a “cannot be opened because it is from an unidentified developer” warning. To bypass it:
- Right-click (or Control-click) Radian.command on the Desktop and pick Open.
- Click Open in the confirmation dialog.
After that first launch, double-clicking works normally. A small Terminal window will open alongside the app — leave it open while you use Radian; it’ll close itself when you quit.
Running it again later
Once everything is set up, you have two ways to launch Radian:
- Easy: Double-click Radian.command on your Desktop.
- From Terminal:
cd ~/Projects/radian
source .venv/bin/activate
python main.py
When you’re done, you can deactivate the virtual environment or just close the Terminal window.
Troubleshooting
zsh: command not found: python3 Python isn’t installed. Get it from python.org or Homebrew (brew install python@3.12), then retry.
git clone asks to install Xcode Command Line Tools You don’t need git — use the curl + unzip method in step 4.
pip install fails on PySide6 Make sure pip is current (pip install --upgrade pip) and Python is 3.10–3.14. Older Python versions don’t have wheels for PySide6 6.11.
requirements.txt looks empty or has weird characters Re-run the iconv line in step 5 — it’s UTF-16-encoded and needs converting before pip can parse it.
App crashes / blank window Try upgrading the GUI libraries inside the venv:
pip install --upgrade PySide6 skia-python
Quick copy-paste version (one block)
Yes, this still requires forking first (see Steps 1 and 2). Once you have Python 3.10+ installed and have forked the repo to your GitHub account, replace YOUR_GITHUB_USERNAME below with your GitHub username and paste the whole block into Terminal:
mkdir -p ~/Projects && cd ~/Projects
curl -L -o radian.zip https://github.com/YOUR_GITHUB_USERNAME/radian/archive/refs/heads/main.zip
unzip radian.zip && mv radian-main radian && rm radian.zip
cd radian
iconv -f UTF-16 -t UTF-8 requirements.txt > requirements.utf8.txt
mv requirements.utf8.txt requirements.txt
python3 -m venv .venv
source .venv/bin/activate
pip install --upgrade pip
pip install -r requirements.txt
cat > ~/Desktop/Radian.command <<‘EOF’
#!/bin/bash
cd ~/Projects/radian
source .venv/bin/activate
exec python main.py
EOF
chmod +x ~/Desktop/Radian.command
python main.py
After this finishes, remember to right-click Radian.command on the Desktop and choose Open the first time to bypass macOS Gatekeeper (see Step 9).
3 Likes