
You are Welcome ![]()
Oi,
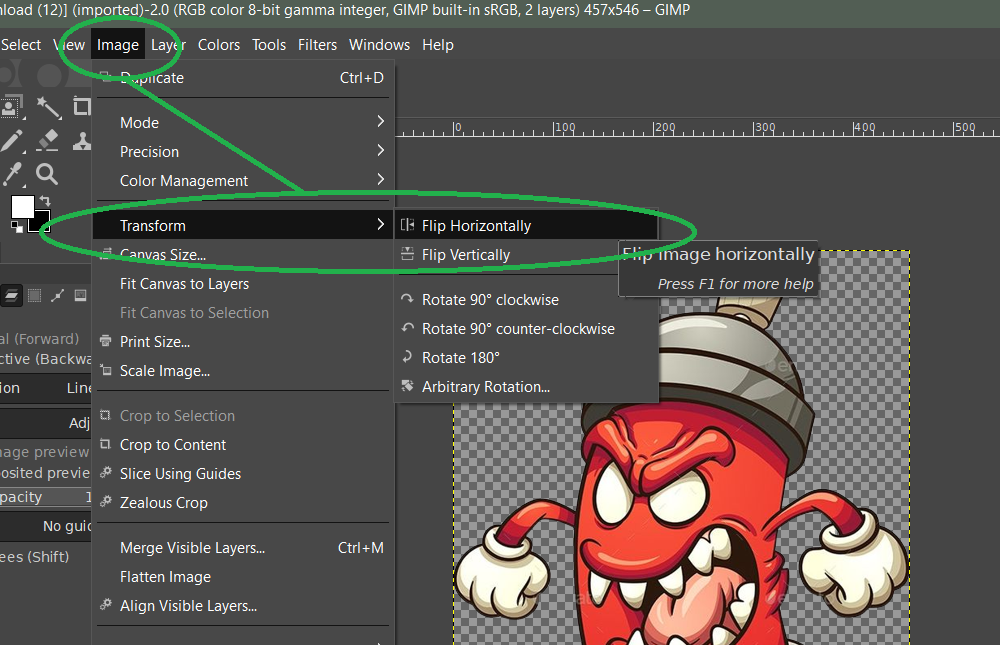
Alguém pode me informar como inverter para colocar imagens idênticas uma de frente pra outra?
Os modelos que tenho encontrei já nessas condições mas, gostaria de saber como fazer essa inversão e mudar a cor das mesmas.
Hi, Can anyone tell me how to reverse to put identical images facing each other? The models I have already found in these conditions, but I would like to know how to do this inversion and change their color
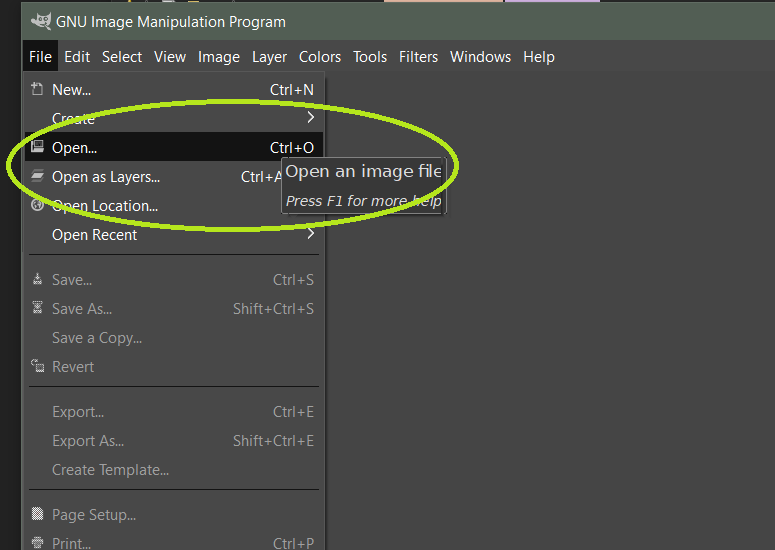
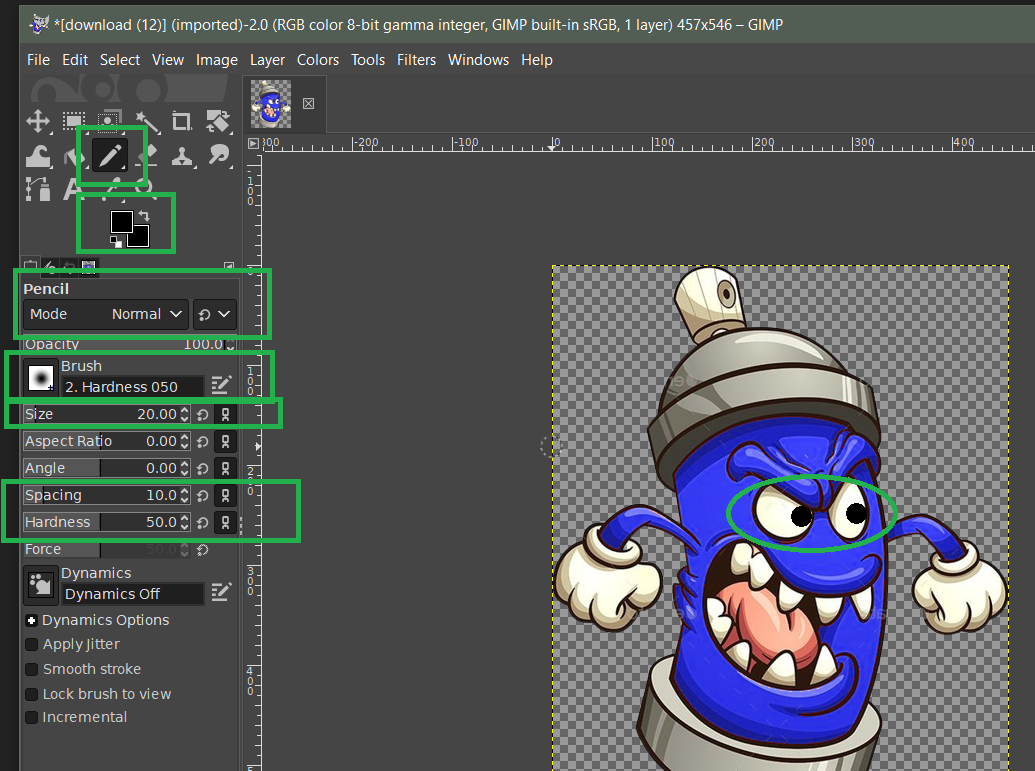
Looks like another Gimp Masterclass is required!
I’m amazed at the patience of those involved.
And now I know how to increase my trust level from member to regular - not that it concerns me, as we are all here to help and that’s what makes this community so great!
Oi @BIELITZ desculpa pergunta mas, a tradução entre línguas modifica o significado ao ser transcrito de uma língua para outra.
Poderia por gentileza ser um pouco mais claro para que eu interprete corretamente?
Hi @BIELITZ sorry to ask but translation between languages changes the meaning when transcribed from one language to another.
Could you please be a little clearer so that I can interpret correctly?
Sure - I’m just emphasising how good the people in this community are ![]()
I have found that Gimp is too complicated and difficult for me - I use Paint.net, Paint 3D(part of Windows) which are much simpler to use and have square/rectangles with rounded corners. If you have MS Office it also has shape tools.
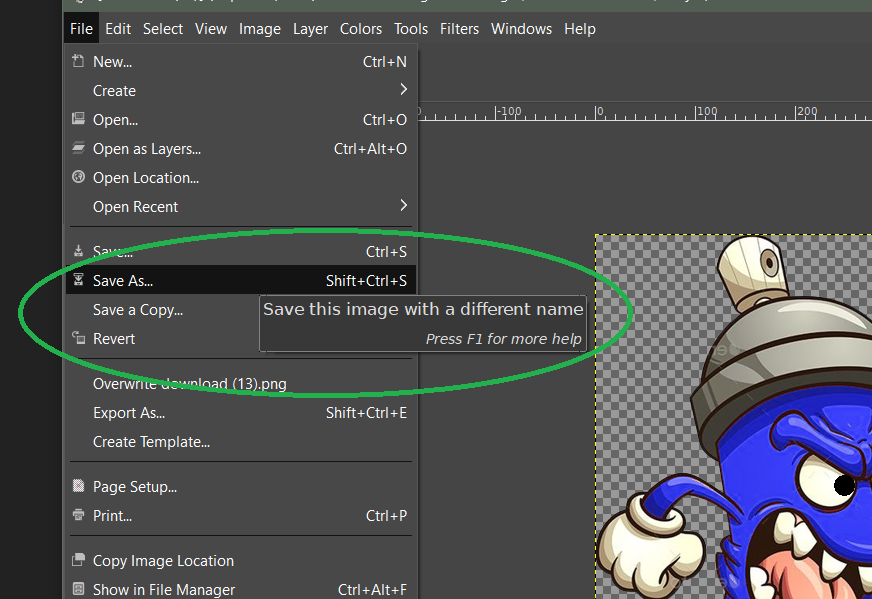
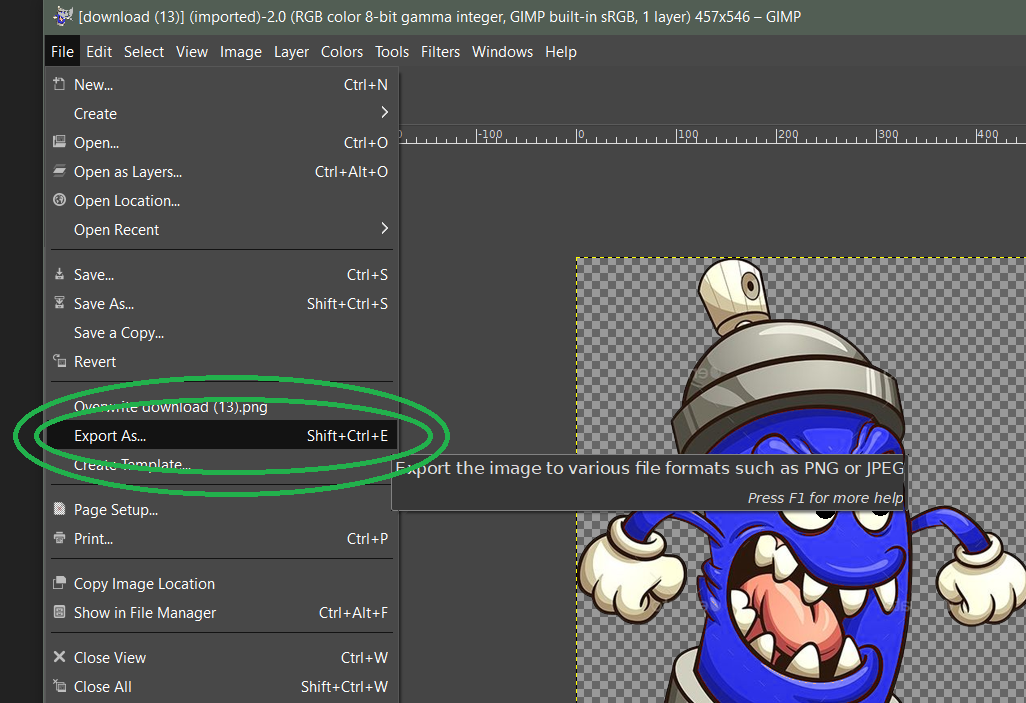
Draw what you need using the available tools select and save in a folder somewhere (I have one folder per watchface). You can then add the image in Creator.
If I want the image to have a transparent background I use Make a PNG Transparent – Online PNG Maker
Spend some time learning these applications (they are much much easier than Gimp)and you will see how rewarding putting in the effort will be.
Enjoy yourself in Facer creating the watchfaces you like and you are amongst friends here so just have fun!
Ok amigo,
Entendi e fico muito grato por sua atenção para comigo!!!
Deus te abençoe!!
Ok friend, I understand and I am very grateful for your attention to me!!! God bless you!!

@russellcresser covered both of your questions with gimp.
in case you would like to experiment with powerpoint, the coloring possibilities are limited, but mirriring is quite simple there. I would show you that in images, but I have localised version, and it could confuse you, so I just describe the steps.
-You would open empty presentation.
-Make the windows smaller, so you can have the file explorer next to powerpoint side by side.
-Find your image file in explorer. Drag and drop it onto the empty “canvas”. Do not worry if its too big, just zoom out.
-Pull one side handle of the image to its opposite side and beyond the edge, so it becomes reversed.
-Right click the reversed image and click “save as image”.
-Choose name and location where it will be saved.
(btw. this way you can save any shape or text you make in powerpoint as a separate image with transparent background. even a square with rounded edges)
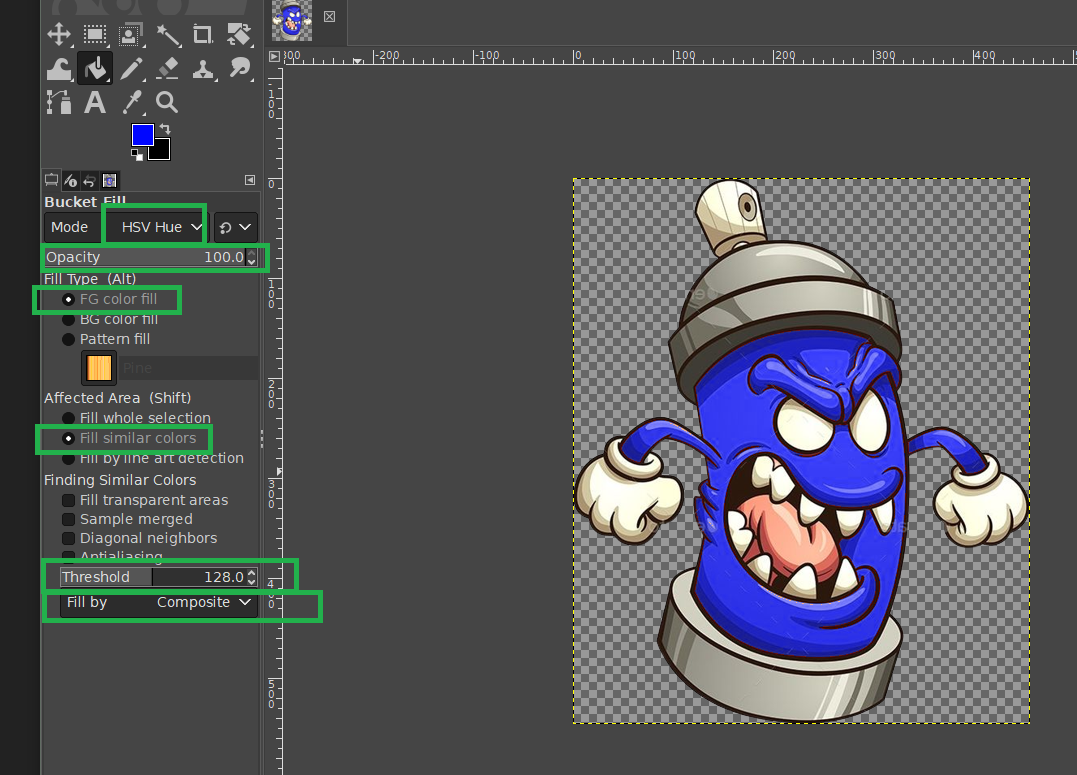
Gimp is really complicated, but also gives multiple ways to same goal.
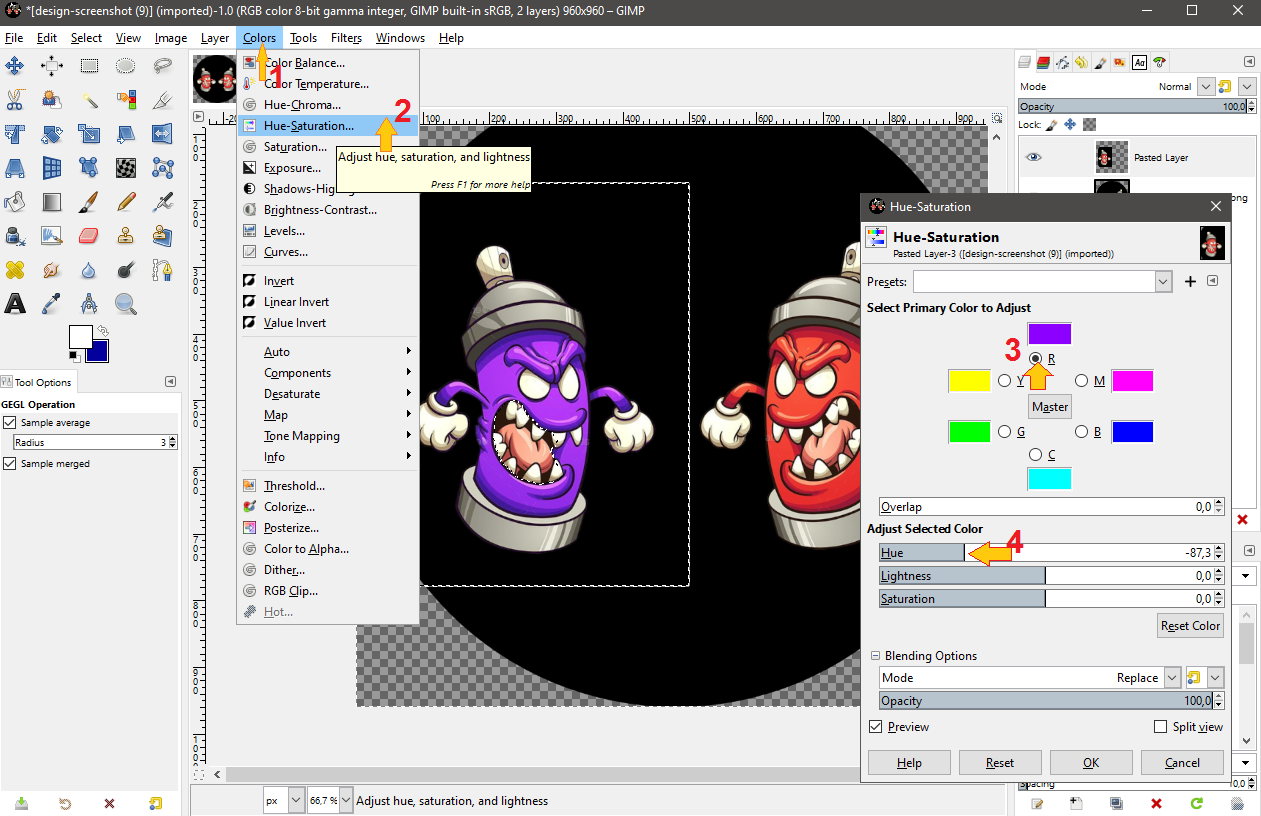
That recoloring with it could also be done using the color manipulation tool.
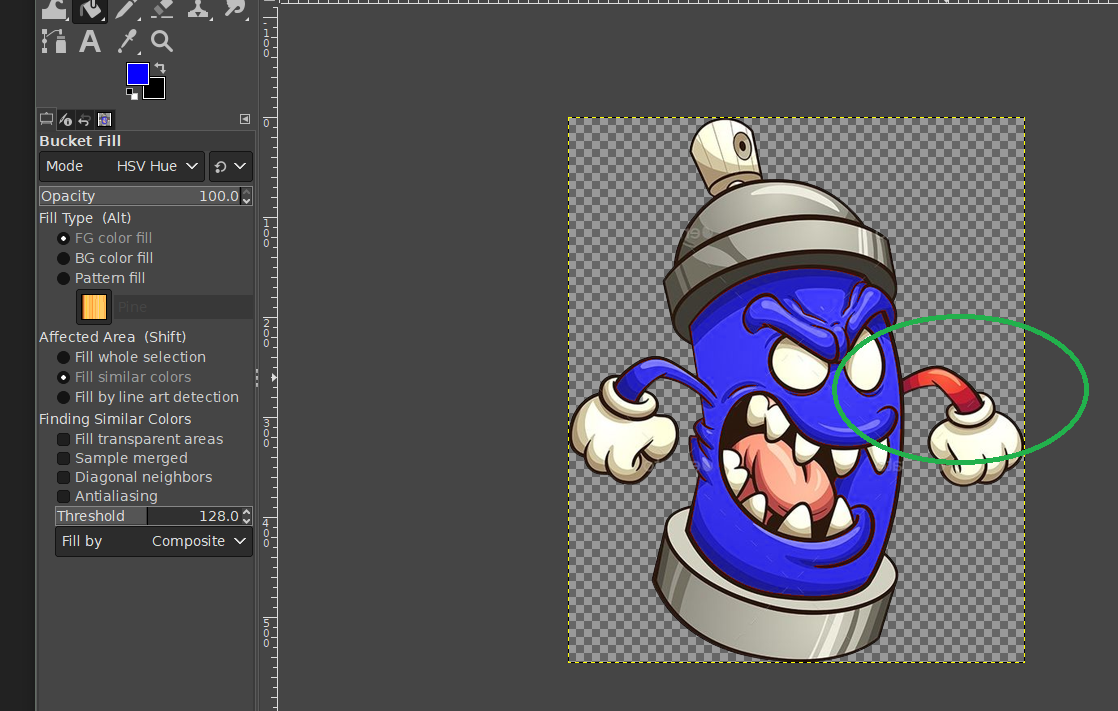
-Selecting everything but the mouth with tongue
-adjusting the red color to any other.
I have only used GIMP for a couple of things that I could not do on Autodesk Sketchbook . I made a couple of polar fades after watching a YouTube Tutorial . A couple of other things I have forgotten . So many thanks Peter @petruuccios it is great to see other ways of doing things . I wonder which version of GIMP you are showing us . You have a lot of nice tool icons there . I suppose you can dock them there if you know what you are doing .
Hey Peter will you please give us a clue about selecting the area to Manipulate .
Agradeço a todos pelas informações em especial aos amigos @russellcresser e @petruuccios por toda paciência e atenção vou fazer e, espero conseguir.
I thank everyone for the information, especially my friends @russellcresser and @petruuccios for all their patience and attention.
Some People are Learning Always .
.
.
Algumas pessoas estão aprendendo sempre.
I use the version 2.10.32 with the early style of icons. I did not like the “new” fade to dark grey theme when they came with it. In general I do not like when somebody jumbles my toys, when I finally started to learn their order. I thought I mentioned it here around post 270. here is how its set

Hey thanks for that Peter .I like working on a dark background but it is Good to know how to change stuff . I get most of what I want done without GIMP . but it is agood tool for a lot Obviously .
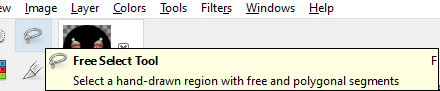
I used the free select tool to first select the area I planned to exclude (since it was smaller), then I hit ctrl+I to invert the selection to everything else than that area. It is easy to add or remove parts of current selection by picking one of the selection tools and holding shift to add or ctrl to subtract new areas. btw. I like to share these ideas, but I think we slide far from initial topic ![]()


Só não consegui alterar para azul…mas deu certo!!! Mais uma vez muito obrigado
I just couldn’t change it to blue…but it worked!!! Thank you one more time
Yeah .I agree . It is too easy for these Topics to Slide . Thanks for the best Help which is obviously Key Stroke Shortcuts are Involved . Thanks again .
Hey Well done . Good bit of Learning . You need to practice lots . When you have done 1000 Hours you will know what you are doing .
.
.
.
Ei, muito bem. Bom aprendizado. Você precisa praticar muito. Quando você tiver feito 1000 horas, saberá o que está fazendo.