Hi all.
Couldn’t see something similar so I thought I would run up an inspection example with some of the most basic expressions for beginners.
Several of these I had trouble with at the start. going back and rebuilding some of my old designs for example, I found that I used to use separate text for 12/24h and opacity to hide.
Sometimes it’s easier to visualise what you want at the start rather than just see the expressions written down here and inspection lets you play.
Included a couple of shape based bevels to show you can achieve some good effects without resorting to fancy images. Only used the wood as I had just been using it and it shows off the bevels well.
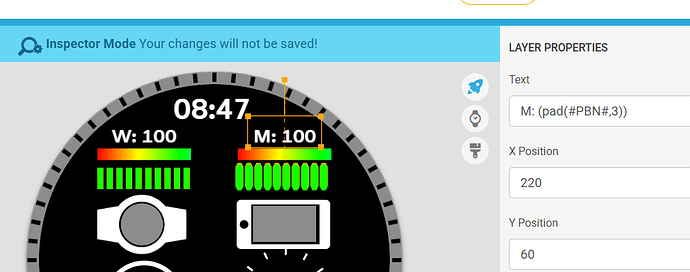
Remember, this is your friend:

Outer ring elements will need to be unlocked to inspect. They are locked to prevent accidental selection.
5 Likes
Very Good . Dead Packman  Brilliant .
3 Likes
Hehe. I did one of those too. I really should have used an arc instead of an image but it was early days for me
6 Likes
Also, please let me know if there are any things I could have done better, or easier. We are all always learning here.
Yes I know PB uses CLAMP in the opacity and WB doesn’t. When I started that I didn’t understand the differences but have left them that way on all my faces since as they are functionally equivalent in this case and it gives me working examples of both methods.
3 Likes
I’ve added expressions for previous/next hour/minute/day/date. They are not so much difficult but tedious.
With the longer ones, I’m looking at you Date, it’s too easy to miss or overlap conditions.
3 Likes
Pacmans are so amusing, both watchfaces! Cool! 
4 Likes
A fun example of using #DNOW# expressions for linear traversal of elements:
4 Likes
OK, In the first template the focus was on digital time and dates. The aim being to have a repository of really simple things like ensuring 12/24 hour formats were catered for. I got several of these wrong when first starting out.
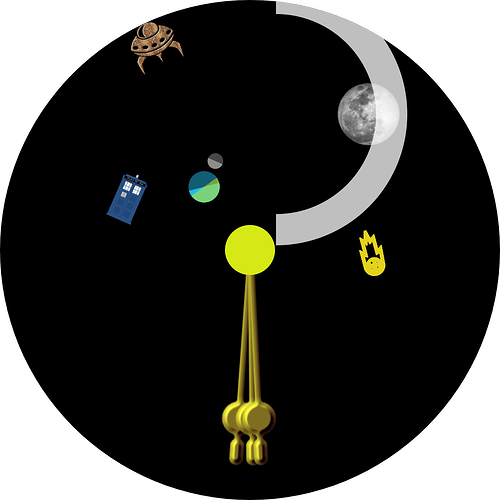
In this one we focus on the analogue and I wanted to make it a little fin so I picked the solar system (albeit earth centric) as a model.
It’s only just started and I haven’t done much but hands so maybe others have ideas as to what to put in. Maybe there are some static items that can go in or some theme centric digital stuff.
It certainly like to get 2 moon phase versions in there, one image stack and one wobbly mask thingy (I think that’s right). I tried to follow the thread but it is long and deep so if someone (not mentioning names here ;-) could point me at very simple examples and associated resources I would be very grateful.
So Before the link some reference as to what the bits mean. I know I was daunted when first seeing complex expressions and not really knowing which numbers to tweak so let’s look at the alien that is the second hand (TARDIS is minutes and earth is hours).
X
(160+(145cos(rad(((#DWFSS#))-90))))
Y
(160+(145sin(rad(((#DWFSS#))-90))))
So, #DWFSS# is your rotation for seconds. Minutes and hours have their equivalent and you can swap them out.
I think this is just maths you can leave alone and it’s just the first 2 numbers that are important.
The first is the centre point of your rotation, 160 being the centre of the watch of course.
The second is the distance out of your object.
If you need to rotate the object as it moves around the screen you will generally just use #DWFSS# or the equivalent interval. If the object starts sideways you may need (#DWFSS#-90) to start it in the upright, or for a TARDIS that starts upright (#DWFSS#+90)
That’s pretty much it. Until you want to do something other than hours, minutes and seconds.
Oh, the pendulums are just for me to look at while working on stubborn braincells.
3 Likes
Here is a Classic Moon Phase Kit . The mask can be adjusted to use less radial horizons but you have to compensate on Moon Discs . This is just as simple as you can get . You Can use the two discs Static to Give a basic mask for a northern and southern hemisphere view which is also classic . Out of interest for testing the New Moon this year ( 2024 ) According to Creator calendar is 11:46 AM .
.
.
Rotation Formula for Moon Discs .
((#MOONAGEPERCENT#)*180)
.
.
.
.
2 Likes
Cheers. Now to work out how to use them. Do you suggest drilling a hole in the background to put the mask behind? Easier on plain black as you can use shape masks but seeing how to do it behind a patterned background could be good for folks.
So, just looking at this it seems the mask would rotate over both images and you would Y shift at full/new moon?
2 Likes
I tested those as they are . It is all a bit tight but if the images are set the same size and centre position it will work perfectly . Just Drop them into a Face . I have Bezels and other masks . But those can be used as cutters and all sorts .
You Rotate the Moon Discs Behind the Mask .
I just added a Slightly more Feminine Mask a bit Less Geometric .
2 Likes
So, both the stacked image and rotating moons are great and I can see using the wobbly mask with rotating moons at some point. I may even try to add XY motion to both to keep the moons showing as a single static.
In the mean time I had a crack at my own version with one moon image and one arc as a mask. It’s not as accurate a representation as the 28 images as the mask is perfectly circular and the real moon shadow is not. Down side of that is that you need 28 conditionals for X, radius and inner radius. This could be cut down as many are the same but flipped but I wanted to keep generation easy.
I created a spreadsheet where you enter the centre X of your moon and your radius (half moon image width) and it generates your mask expressions for you (Dropbox)
I have added it to the V2 expressions template, above.
2 Likes
That is amazing . I know for absolute certain that has not been done before . I don’t know what you mean about it not being a fair representation of how the moon shadow works . It looks perfect to me . Jolly well done . That is not Voodoo . That is JU JU .
Thanks for sharing the Drop box Link .
.
2 Likes
Cheers. It is the images you provided that made it possible.
Once I had cropped the images so I could easily change the image/icon to 60x60 (30 radius - good size to zoom in on while leaving space for text of checks and the time machine on screen) it was just donkey work to just load each in, line up the arc to cover the dark and record the properties in excel.
Made the leap that measuring X as a difference from original 160 and using % of radius for all calculations let me build the expression generator for any centre X and moon image radius. The others are just ‘if range then…’ based on wax, wane, full, new.
Upside is that it’s clean and easy to use if you have access to the downside.
Downside is that for easy use you need the excel generator but I don’t intend to remove it from access.
I keep the working excel in OneDrive so the Dropbox one will only change based on feedback for any changes or errors suggested, once tested.
You could at least have made the screenshot while the alien was shooting the TARDIS…
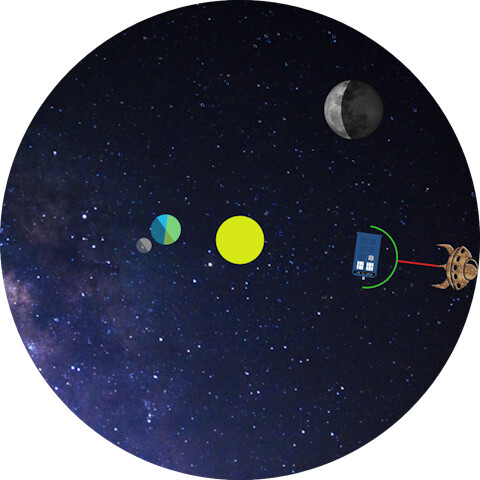
So, main point is that there are several ways of doing rotary movement there and if there are better ways post them. If explanation on how each bit of an expression does what, ask.
Currently the orbit of the moon (tiny one) is ticky so may convert to DNOW, or put a 2nd 90° moon for comparison of the 2 methods. Thoughts on a postcard.
2 Likes
I’ve done one with a few battery guage templates from the very basic to the more complex:
As always, thoughts and improvements welcome.
2 Likes
Great work . May be not W on Phone battery .
.
1 Like
Done. Always the little things
1 Like

