At @Nerioalberto’s recommendation, here is my separate number images tutorial. There may be occasions where your face design requires a number style that is not available in any font you can find. Or maybe you want each digit to be some sort of elaborate creation. In these cases you can still display the digital time without the use of a font by displaying an image for each number instead.
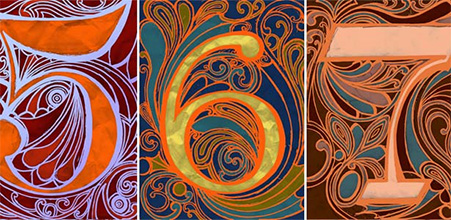
Illustrations:
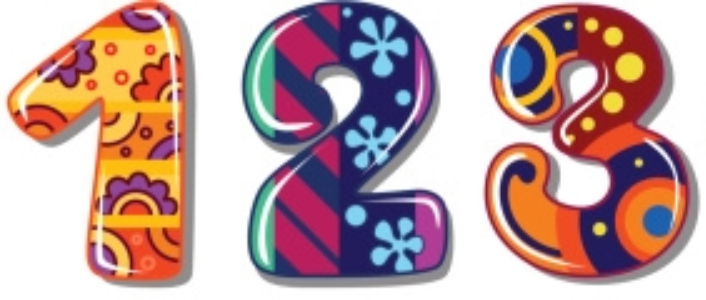
Cartoon-ish:
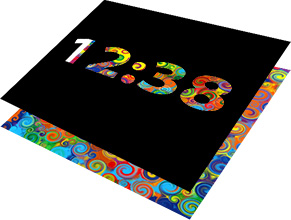
Most interestingly for me is when you want the number to be a see-thru window in which you can see what’s underneath. In this case, the “font” is just a bunch of PNG images with holes in the shape of each number. This is especially cool if the layer underneath has motion.
Some up-front notes:
- The instructions below are for 12-hour time in which all of the numbers are separated. I did not work with 24-hour time, but the idea is the same.
- My work below assumes all numbers are separate - four groups of numbers: tens-hours, ones-hours, tens-minutes, ones-minutes. For this case, you’ll need an image for the numerals 0 thru 9. But you could also combine the hours and just have three groups of numbers. For the hours, you would just build images for 01 to 12 for that case.
- Lastly, my example below is monospaced - every number image, even 1 and 8 are the same width and height. This makes layout very easy, but you could experiment with images that are different sizes. I did not do that here.
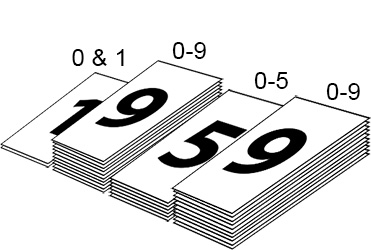
With all separated numerals, you only have to make 10 images: the numbers 0 thru 9. But of course you’ll have to load these 10 images multiple times.
Group 1 layers: tens-hours
For tens-hours you only need to load your 0 and 1 image in the Creator - that’s 2 layers.
Group 2 layers: ones-hours
For ones-hours you’ll have to cover all hours so load all 10 number images 0 thru 9 - that’s another 10 layers.
Group 3 layers: tens-minutes
For tens-minutes you only need to cover an hour’s time so load number images 0 thru 5 - that’s another 6 layers.
Group 4 layers: ones-minutes
Again, for ones-minutes you’ll have to cover all so load all 10 number images again 0 thru 9 - that’s another 10 layers.
In all, 28 layers make up all of the number images needed to display all time possibilities. I renamed the layers as well in Creator to keep track of this craziness. Tens-Hours-0, Tens-Hours-1, etc. Just stack all of your number images in their proper positions in the Creator. For 24-hour time just add another 2-image in the tens-hours stack and change the hours formulas.
Next: WHEN to display stuff (for 12-hour time)…
Group 1 layers: tens-hours
Group 1 is easy, there’s a tag for the tens-hours digit. Just set the transparency when the value comes up.
For the 0 layer - $#DhZA#=0?100:0$
For the 1 layer - $#DhZA#=1?100:0$
Group 2 layers: ones-hours
Also easy, there’s also a tag for the ones-hours digit. Same deal:
For 0 - $#DhZB#=0?100:0$
For 1 - $#DhZB#=1?100:0$ and so on for 2,3,4,5,6,7,8,9 layers as well.
Group 3 layers: tens-minutes
A little harder as there is no tag. But we can peel the 10’s value from the #Dm# minutes:
For 0 - $(floor(#Dm#/10))=0?100:0$
For 1 - $(floor(#Dm#/10))=1?100:0$ and the same for 2,3,4,5 layers.
Group 4 layers: ones-minutes
And a little harder as there is also no tag. But we can split the 1’s value from the #Dm# minutes as well:
For 0 - $(#Dm#-((floor(#Dm#/10))*10))=0?100:0$
For 1 - $(#Dm#-((floor(#Dm#/10))*10))=1?100:0$ and the same for 2 thru 9 layers.
Some examples (Inspection mode is on):
My Rusty Meter face uses a separate Nixie Tube image for each numeral 0 - 9
My runners Edge face uses 1 to 12 images for just the hour, but this is an example of using an image as a “hole” to see what’s underneath.
Well that’s it. If you have any questions please let me know.
Thanks 

-john