Hello all,
Just wanted to elaborate on a previous post for the InterAccel function found HERE.
I had some remaining questions from the documentation provided. I think I have these all worked out now and you can see below how the function can be used.
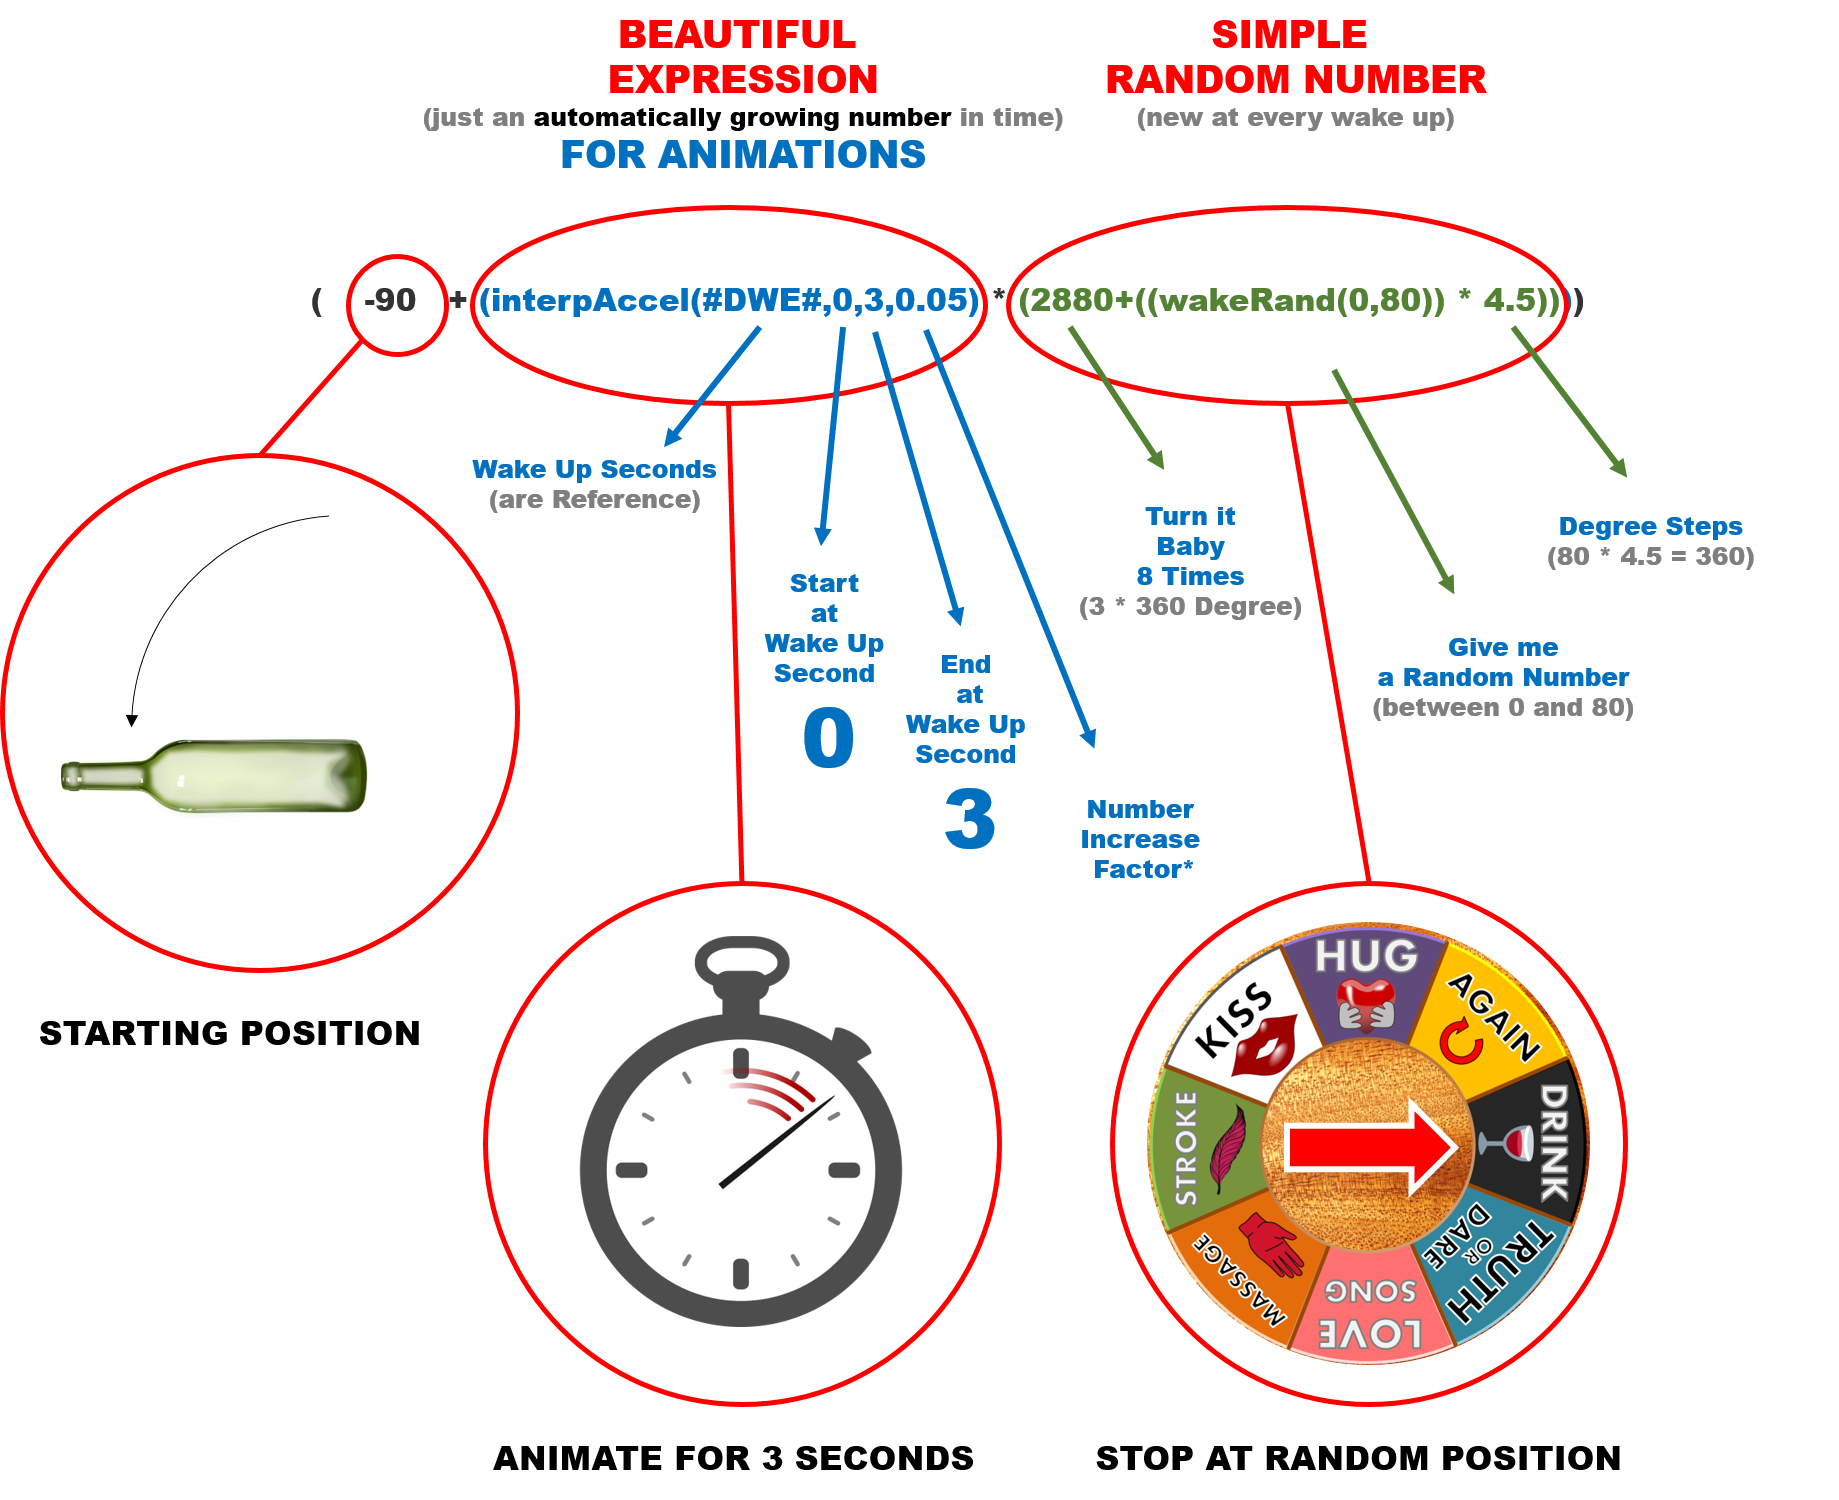
Here is a breakdown of the expression and its elements:
interpAccel(Time format, Min, Max, Acceleration Factor)
Time Format = this can be any time related tag. Generally #DWE# is easiest to start with since it is a simple running time that starts when you wake your watch.
Min = Start point in the Time Format you chose above
Max = End point in the Time Format you chose above
Acceleration Factor = Speed at which the interval accelerates
From this I had a few questions in trying to implement this expression. The difficulty is understanding that you need to have a start and end point. This is different from the expression above. The full formula is really:
(x+(interpAccel(Time format, Min, Max, Acceleration Factor)*y))
x = starting point
y = end point
For instance, here are three variables on an element that you can use:
Position (i.e. x and y axis)
Placing this expression in the x axis will move an element
- Animation will begin at ‘0’ seconds of #DWE# (wake)
- Element moves from x-axis position of 0 to 160
- Animation will end at position 160 over the course of 2 seconds
(0+(interpAccel(#DWE#, 0, 2, 1.5)*160))
Rotation
@Tomas has a great tutorial on this example posted HERE:
- Animation will begin at ‘0.2’ seconds of #DWE# (wake)
- element from position 0 to #DWFSS# (i.e. current seconds position)
- Animation will end at position #DWFSS# over the course of 0.6 seconds
(interpAccel (#DWE#,0,2,0.8) * #DWFSS#))
Size
Placing this expression in the Size variable (Height, Width, Radius) will increase/decrease its size:
- Animation will begin at ‘4’ seconds of #DWE# (wake)
- Element will start at size 0
- Size will increase to 8 over the course of 2 seconds
(0+(interpAccel(#DWE#, 4, 6, 2)*8))
The last mysterious piece of the expression is the acceleration factor. My best guess to how this works is in the diagram below:
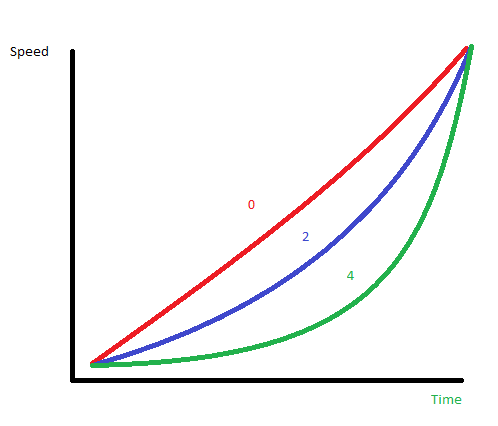
Decreasing the number to 0 will smooth the animation. Increasing it appears to give a ‘ramp up’ in the observed animation.
A few more example faces:
 ).
).