Hello to everybody,
welcome to my new tutorial, where I show you how easy and simple a super cool wrist movements interactive (2D and 3D) effect could be. We will speak about the accelerometer (gyro) functions. Actually, it is so easy that one picture explains everything 
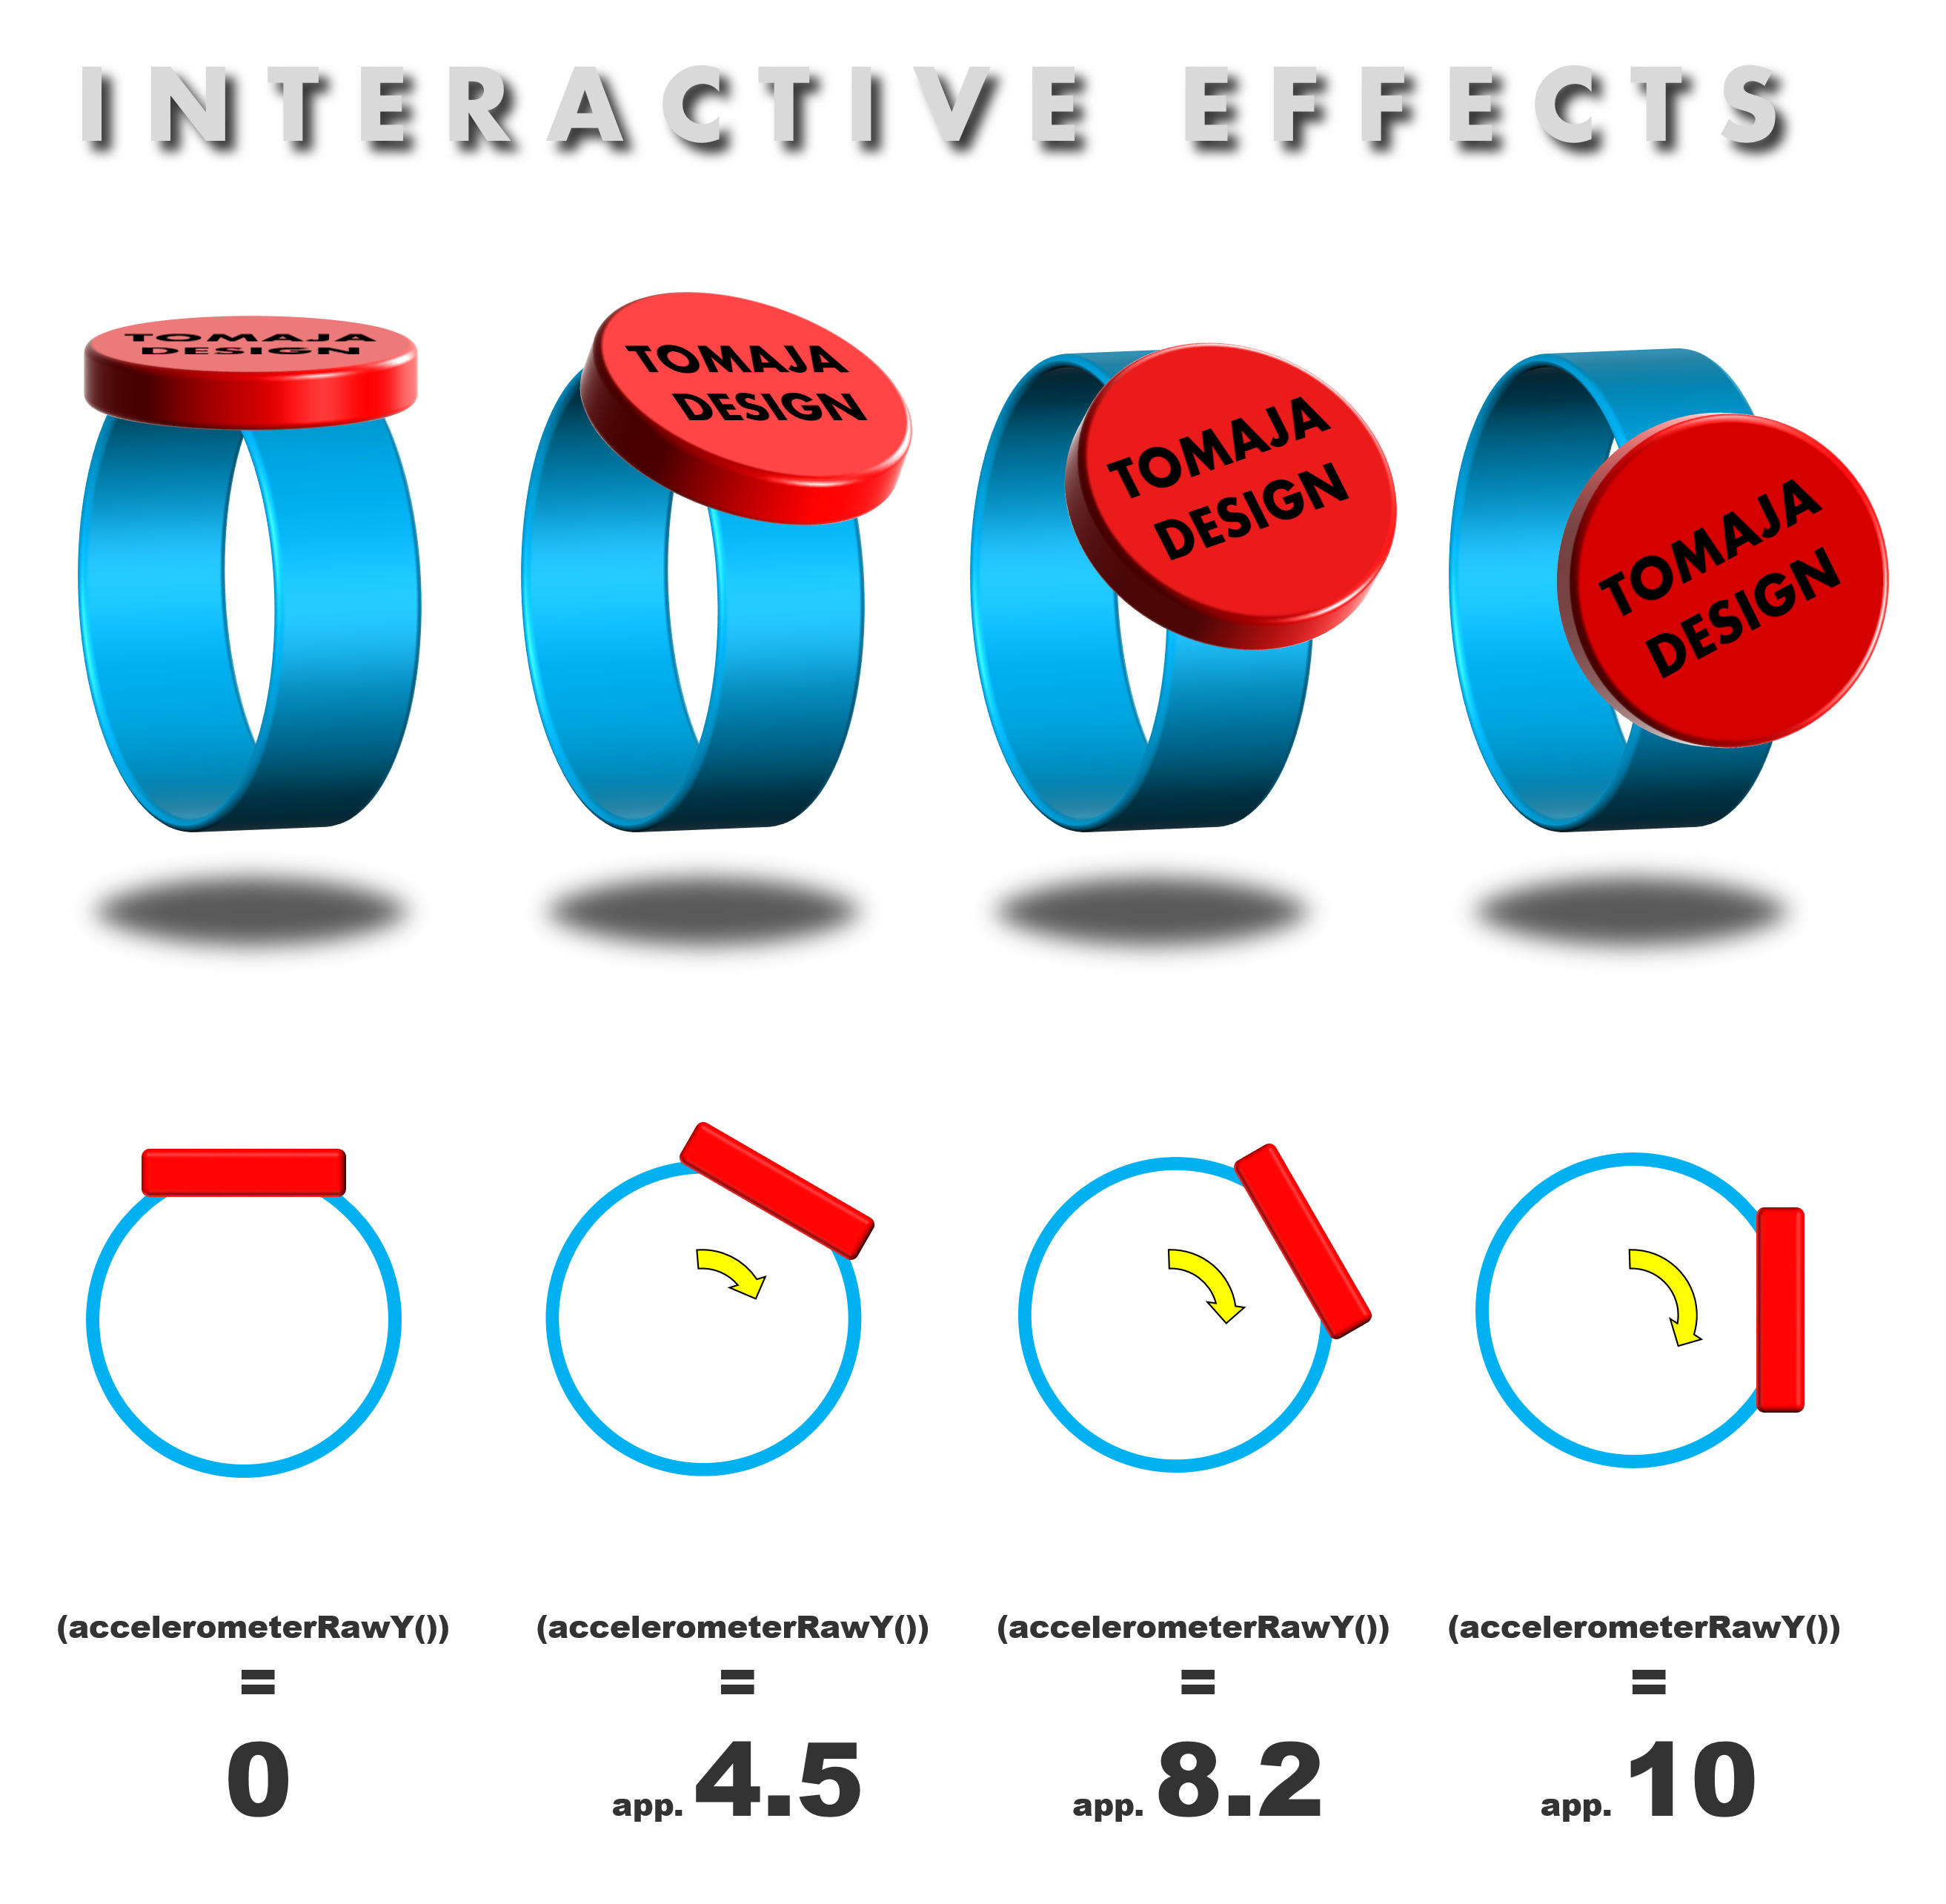
As you see one number is everything we need to deal with. In the picture above (most natural movements of a wrist between the angle 0 and 90 degree) this value is increasing smoothly from 0 to 10.
Here is the “tag” for this Y-Axis movements.
(accelerometerRawY())
The value change depending on the watch position between -10 and +10. Zero is the horizontal position.
The same works in the X-Axis (Right and Left Rotation) in the same way.
(accelerometerRawX())
ANIMATION EXAMPLE
GIF EFFECT - FRAME PER FRAME
Here a simple example for my paid watch face with animation depending on wrist movement.
If you would like to have an animation with 10 frames depending on Y-Axis movements, your coding per frames could looks like this (please feel free to copy & pate those expressions into the Transparency fields):
$(accelerometerRawY())>=8?100:0$
$(accelerometerRawY())>=7&&(accelerometerRawY())<8?100:0$
$(accelerometerRawY())>=6&&(accelerometerRawY())<7?100:0$
$(accelerometerRawY())>=5&&(accelerometerRawY())<6?100:0$
$(accelerometerRawY())>=4&&(accelerometerRawY())<5?100:0$
$(accelerometerRawY())>=3&&(accelerometerRawY())<4?100:0$
$(accelerometerRawY())>=2&&(accelerometerRawY())<3?100:0$
$(accelerometerRawY())>=1&&(accelerometerRawY())<2?100:0$
$(accelerometerRawY())>0&&(accelerometerRawY())<1?100:0$
$(accelerometerRawY())<=0?100:0$
There is also a Mini Tutorial for the flame too.
ANIMATION EXAMPLE
SMOOTH MOVING (ROTATION; TRANSPARENCY, etc.)
Here is another simple example (using only X-Axis Position) with a nice effect and my free watch face:
(160+((accelerometerRawX())*8))
In the open Inspector Mode the interactive dynamic element calls “GREEN WATER”
SECRET FORMULA
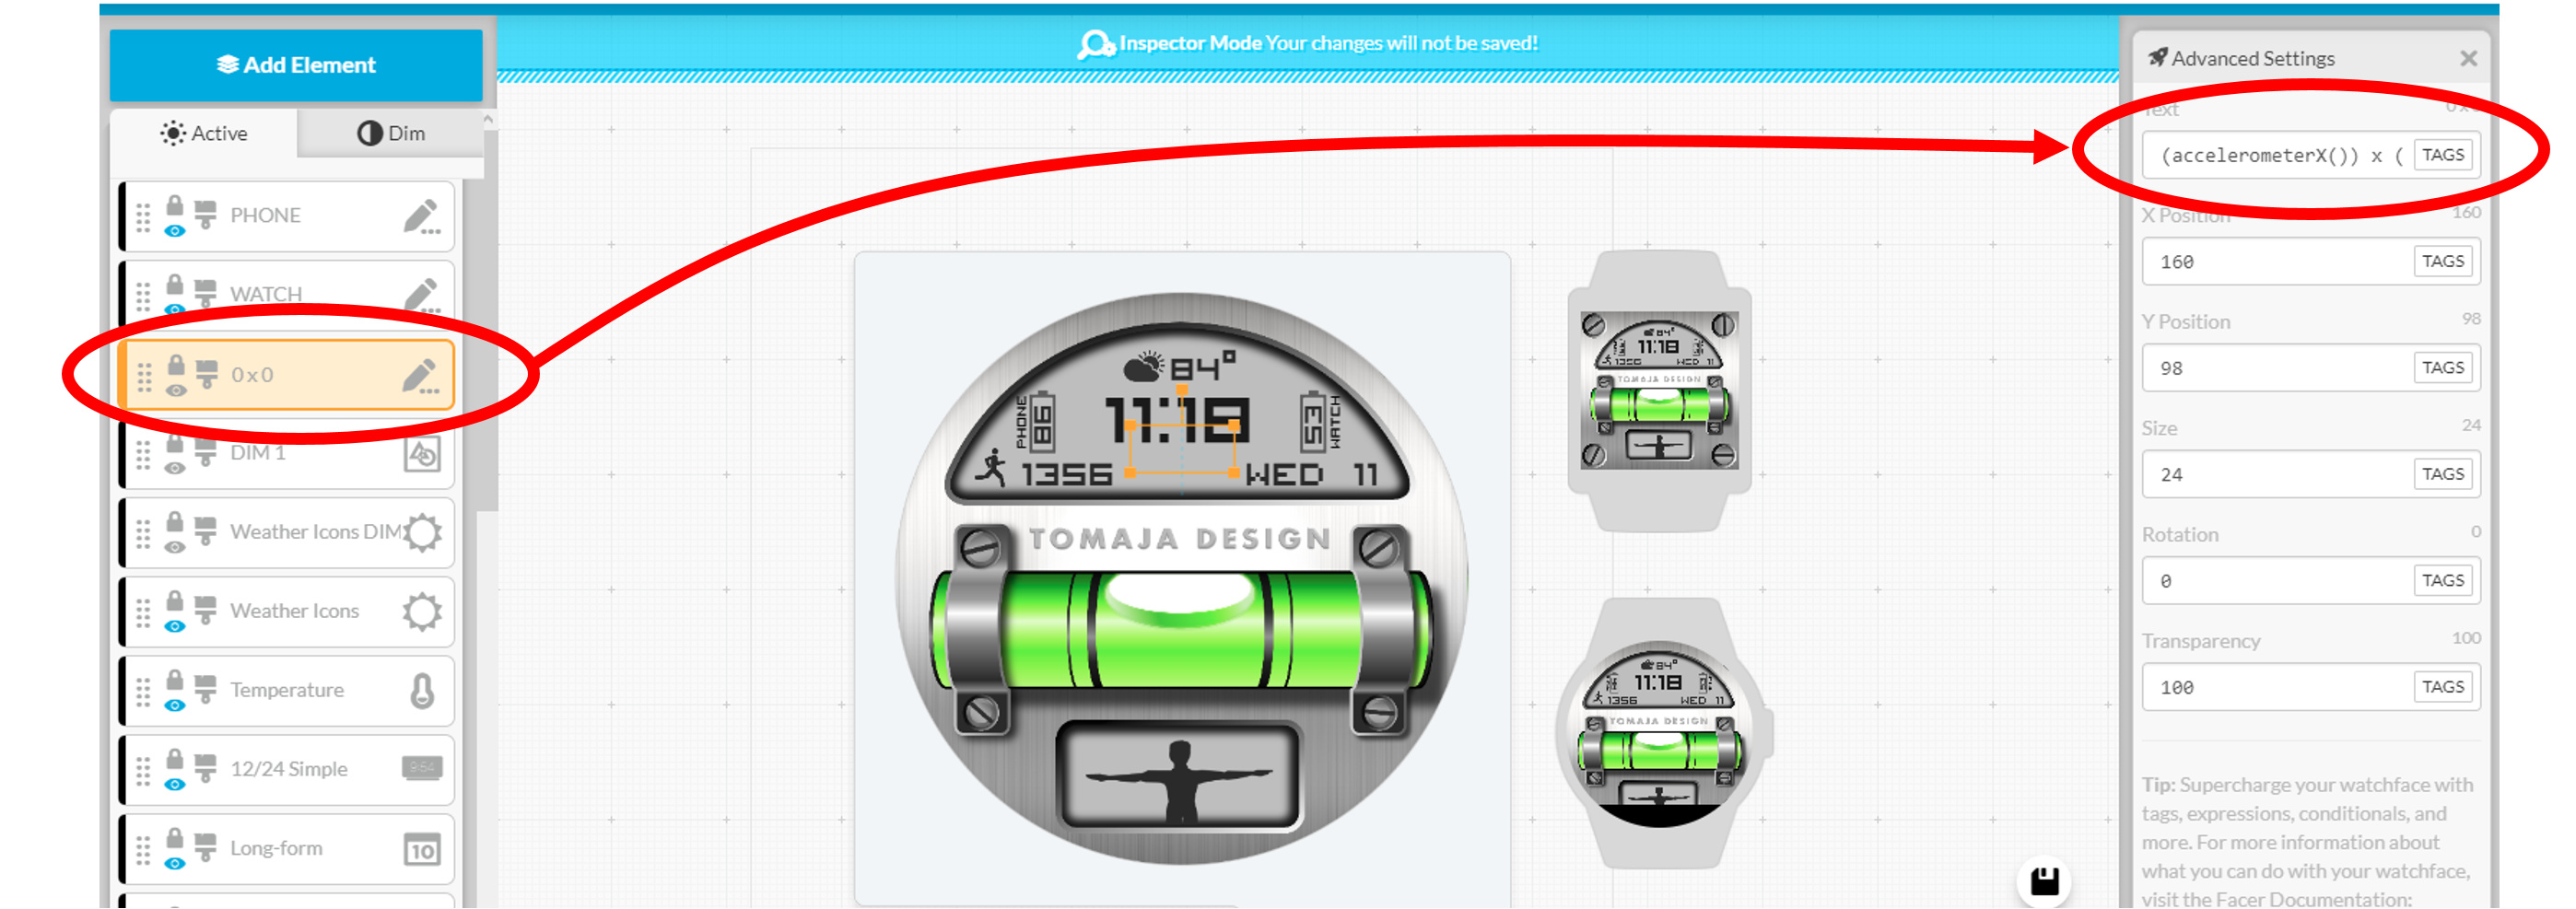
There is (I think still) one important thing for having good results at all different watch faces supporting this function. It’s called the @Mellin s Constant and you will need to put it into your watch face creation as a separated (invisible) element. This small (important) trick start the accelerometer working.
Secret Mellin’s Constant Coding:
(accelerometerX()) x (accelerometerY())
MASTER LEVEL
In the case this tutorial was too easy for you, here is the MASTER LEVEL TUTORIAL for gravity rotation from @Mellin and another one with an example and open Inspector Mode from TOMAJA Design  .
.